Setting up an integration in GitHub
The steps to take to integrate a GitHub repository with Scribe Hub
-
If you haven't yet done so, open a free Scribe Hub account here.
-
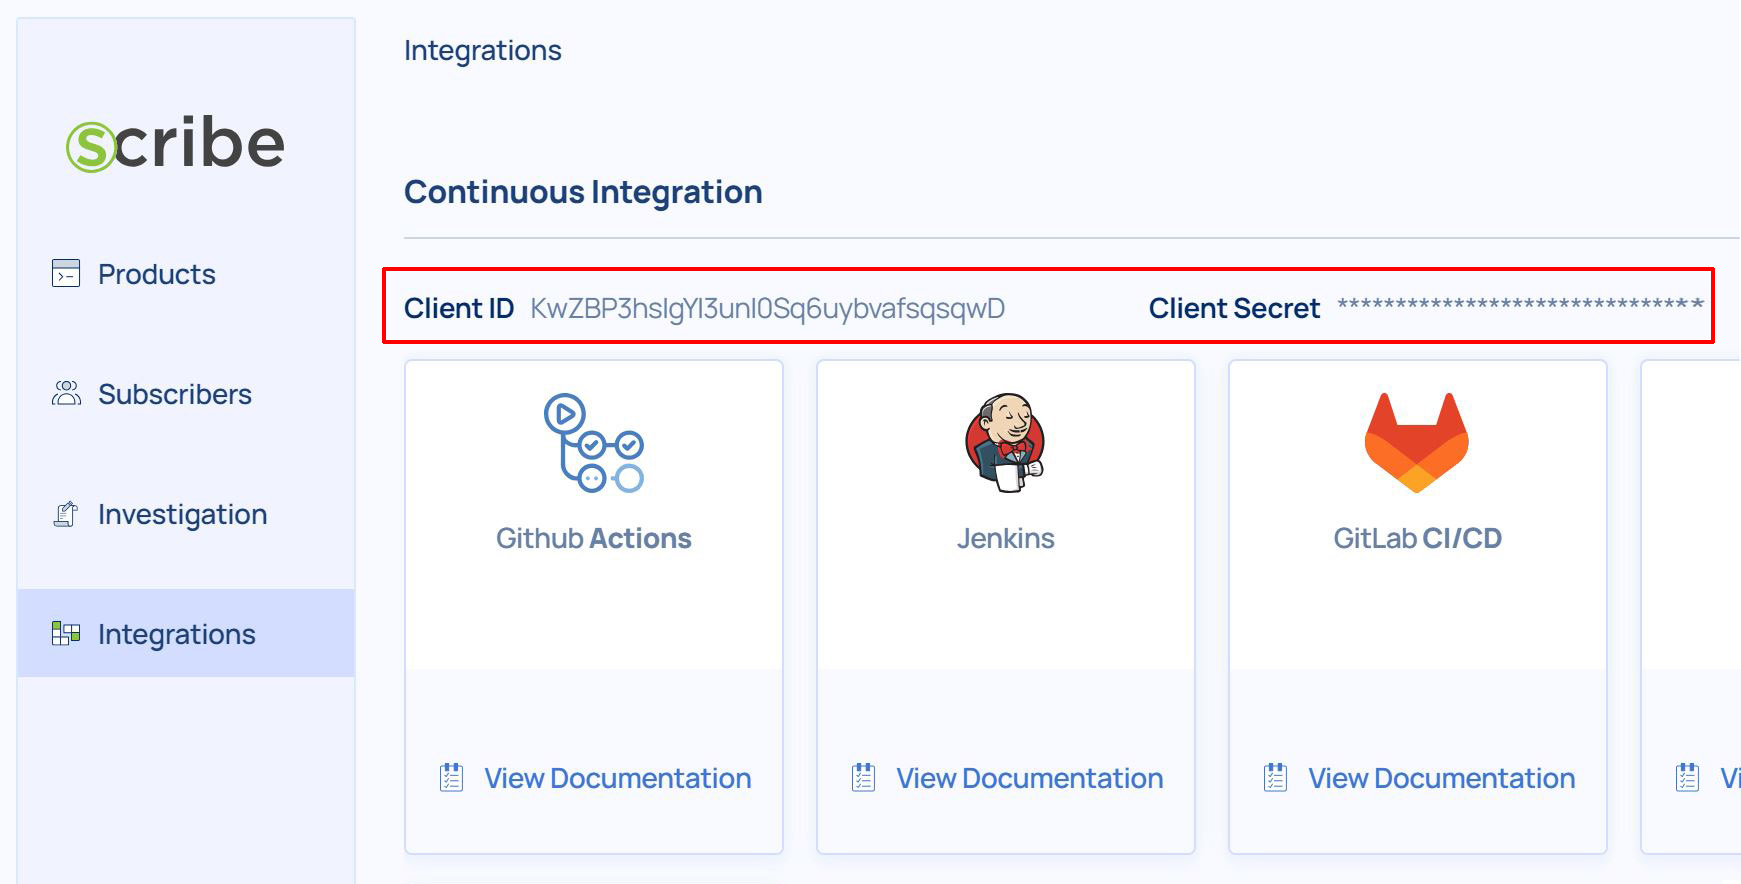
Get your Client Secret credentials from your Scribe Hub Integrations page.
-
Login to your GitHub account.
-
Go to the repository you wish to integrate with Scribe.
-
Define two new
Secretvariables for your repository.
To do that, go to settings → Secrets and variables → Actions → New repository secret.-
Under your repository name, click
Settings. If you cannot see theSettingstab, select the dropdown menu, then clickSettings.
-
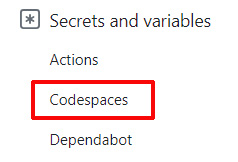
In the
Securitysection of the sidebar, selectSecrets and variables, then clickCodespaces.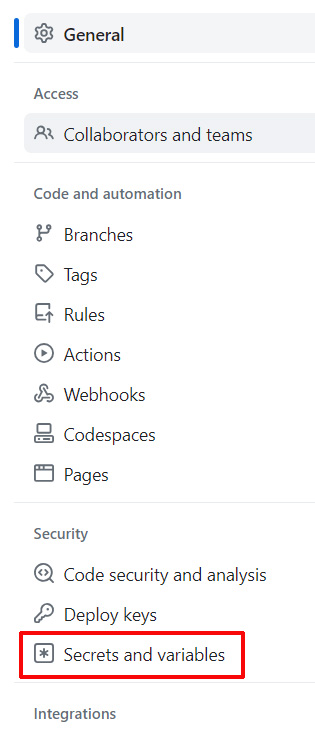
-
At the top of the new page, click the green
New repository secretbutton.
-
Type a name for your secret in the
Nameinput box. you need to add each secret in turn, firstCLIENT_IDand thenCLIENT_SECRET. Enter the value for your secret. In both cases the secret value is the one you get from your Scribe Hub Integrations page.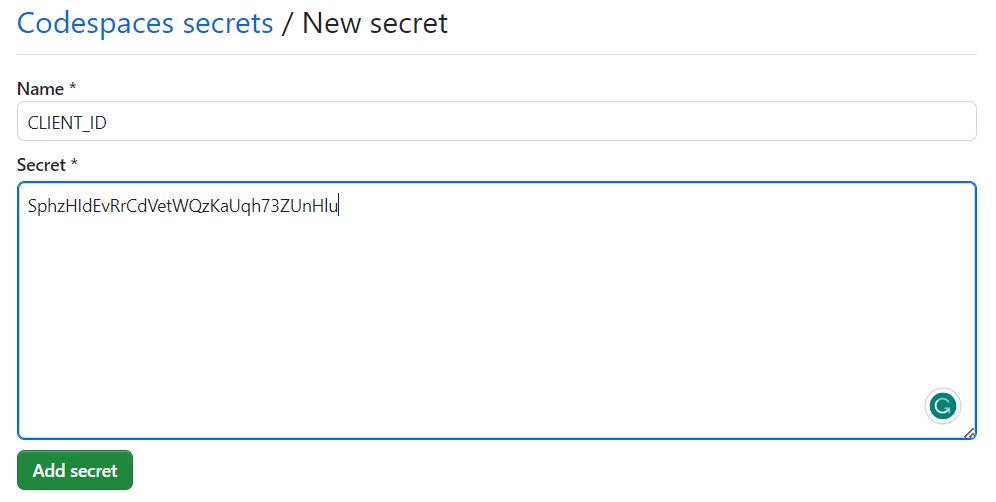
-
Click
Add secret.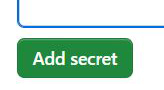
-
-
Now that you have added the
CLIENT_IDandCLIENT_SECRETvariables to your repository you can add the Scribe code snippets into your YAML workflows. This guide assumes you're adding all possible evidence collection points.-
To add automatic evidence collection (a signed SBOM) after each commit
Assuming that you do not yet have an existing pipeline workflow, you need to create a new YAML file under the
.github/workflows/folder in the root folder of your repository.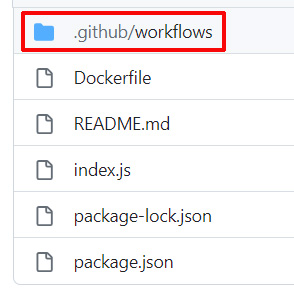
If the folder dosn't exist, create it.
In the folder create a new file called
create-signed-git-commit-sbom.yml. Here's the file's code:name: Create signed git commit sbom
on: push
build:
runs-on: ubuntu-latest
permissions:
id-token: write # workload identity access needed for signing using sigstore-github
steps:
- uses: actions/checkout@v3
- name: Generate signed git SBOM
uses: scribe-security/action-bom@master
with:
target: 'git:.'
product-key: ${{ github.repository }}
scribe-client-secret: ${{ secrets.CLIENT_SECRET }}
label: is_git_commit
format: attest
The
on: pushsegment of this workflow means that whenever there is apushinto this repository, a new signed SBOM of the repository will be sent to the evidence store of your Scribe hub.Once this evidence is uploaded to your Scribe Hub you'd be able to see it on your evidence report.
-
To add automatic evidence collection (a signed SBOM) to your GitHub pipeline workflow
Assuming that you do not yet have an existing pipeline workflow, you need to create a new YAML file under the
.github/workflows/folder in the root folder of your repository.This new file is going to be your GitHub pipeline to create the final image from your repository.
If you already have an existing pipeline workflow open the YAML file.
You need to add Scribe code snippets in 2 main locations:
- Right after the code pull at the start of the pipeline.
- Right after the image is built at the end of the pipeline.
If you are building multiple images, make sure you add the second Scribe code snippet (
Generate signed SBOM for docker image) after each one.Since each pipeline is different this example will only contain just the Scribe code as an example.
    name: Create signed git clone and image SBOMs

    on: workflow_dispatch

    jobs:

    build:
    runs-on: ubuntu-latest

    permissions:
        contents: read
        packages: write
        id-token: write

    steps:
        - uses: actions/checkout@v3

        - name: Generate signed SBOM for repo content
            # Used after git clone at the begining of the pipeline
            uses: scribe-security/action-bom@master
            with:
                target: 'git:.'
                components: packages,files,dep
                                 scribe-client-secret: ${{ secrets.CLIENT_SECRET }}
                format: attest

        - name: Build the Docker image
            # This is a stand in step for whatever needs to happen in your pipeline culminating with building a docker image from the repository
            run: docker build . -t ${{ github.repository }}:${{ github.sha }}

        - name: Generate signed SBOM for docker image
            # Used after a docker image is built
            uses: scribe-security/action-bom@master
            with:
                target: 'docker:scribe-demo-product:${{ github.sha }}'

                product-key: ${{ github.repository }}:${{ github.sha }}
                                 scribe-client-secret: ${{ secrets.CLIENT_SECRET }}
                format: attest
Every time you run the workflow the evidence will be generated and uploaded to your Scribe Hub automatically. You'd be able to see the evidence on your evidence report.
You'll also see a new build version added to the appropriate project:
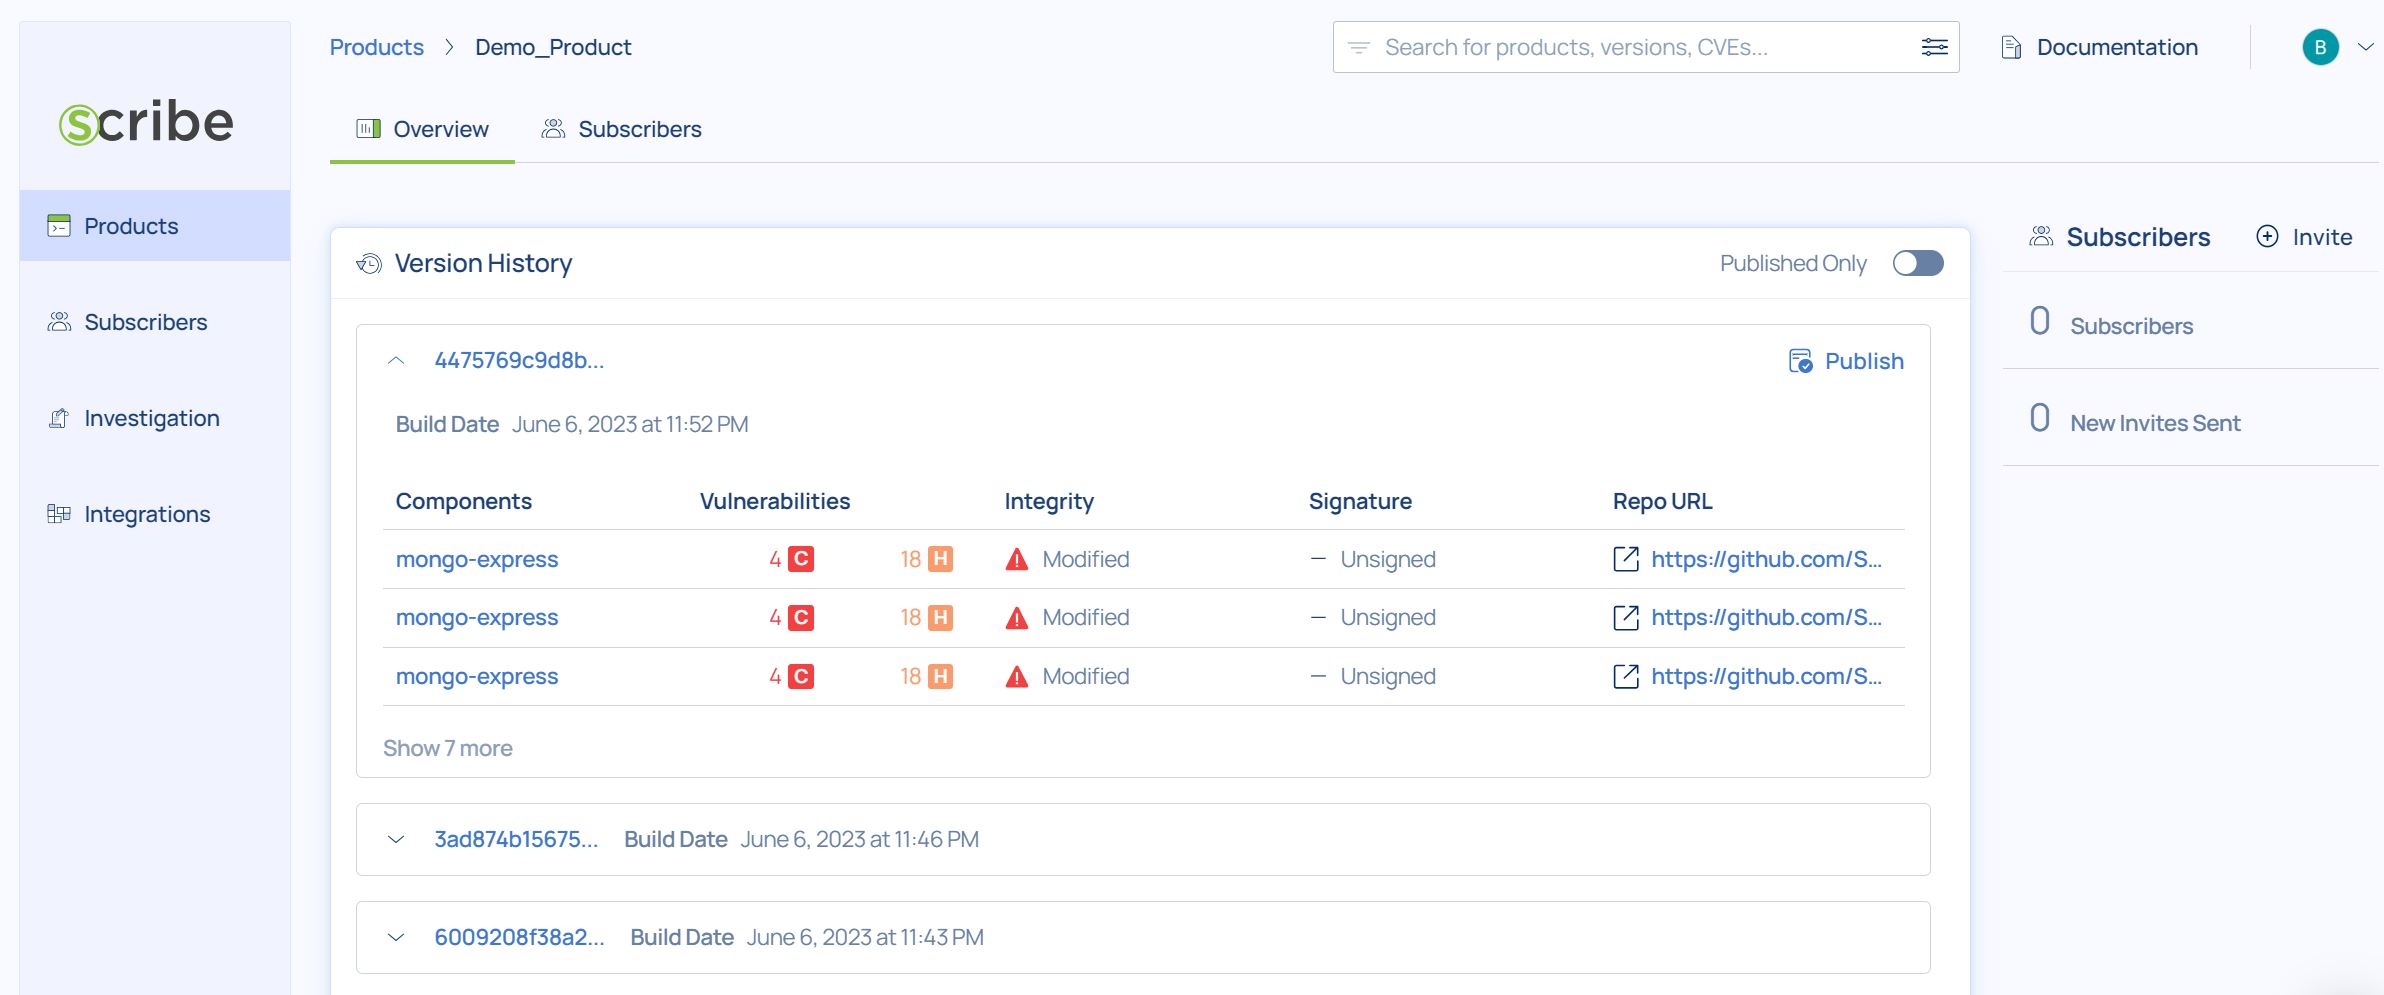
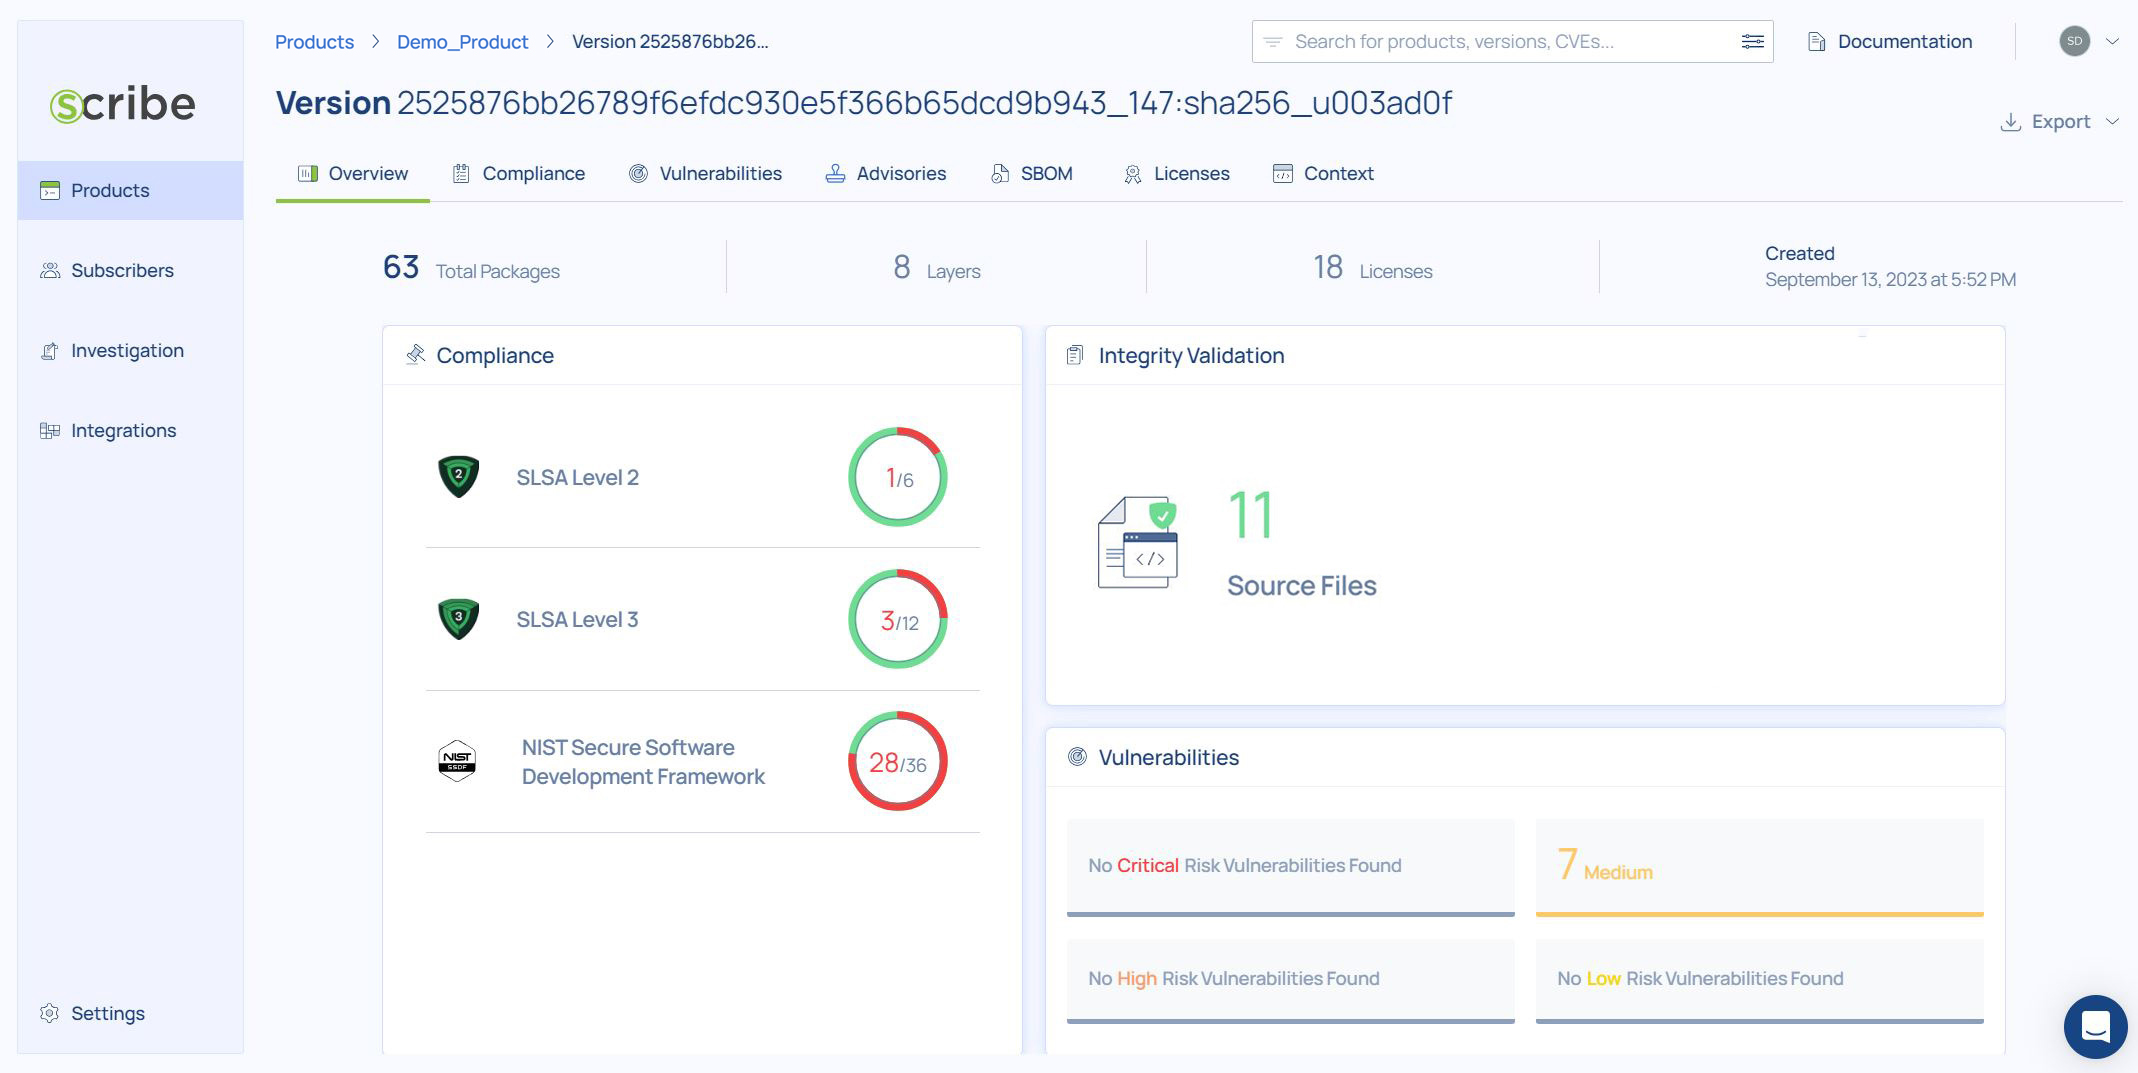
Clicking on the latest added build will allow you to explore all it's relevent information, reports, and insights through the build dashboard:
-
To add SLSA provenance statement collection to your GitHub pipeline workflow
In order to add SLSA provenance generation to your GitHub pipeline workflow you must first connect the Scribe GitHub app to your organizational GitHub account.
To do that:
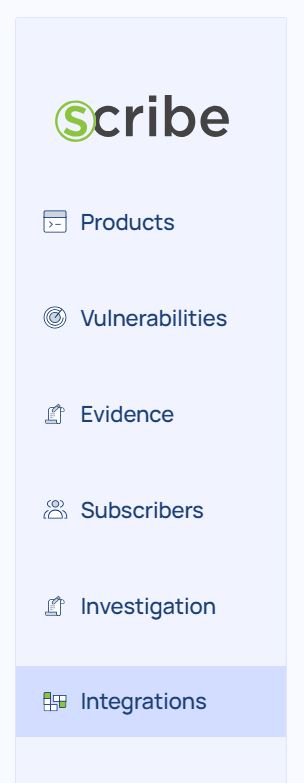
To start the integration go to your Scribe Hub account. On the left options column go to the integrations option.
On the integrations page scroll down to the Source Control section:
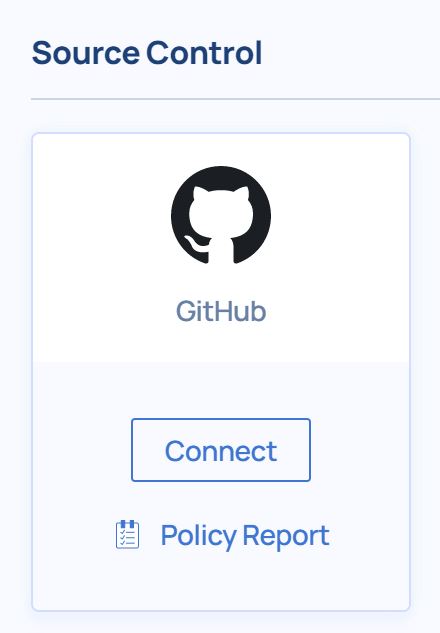
Press the connect button. That will lead you to a page like this:
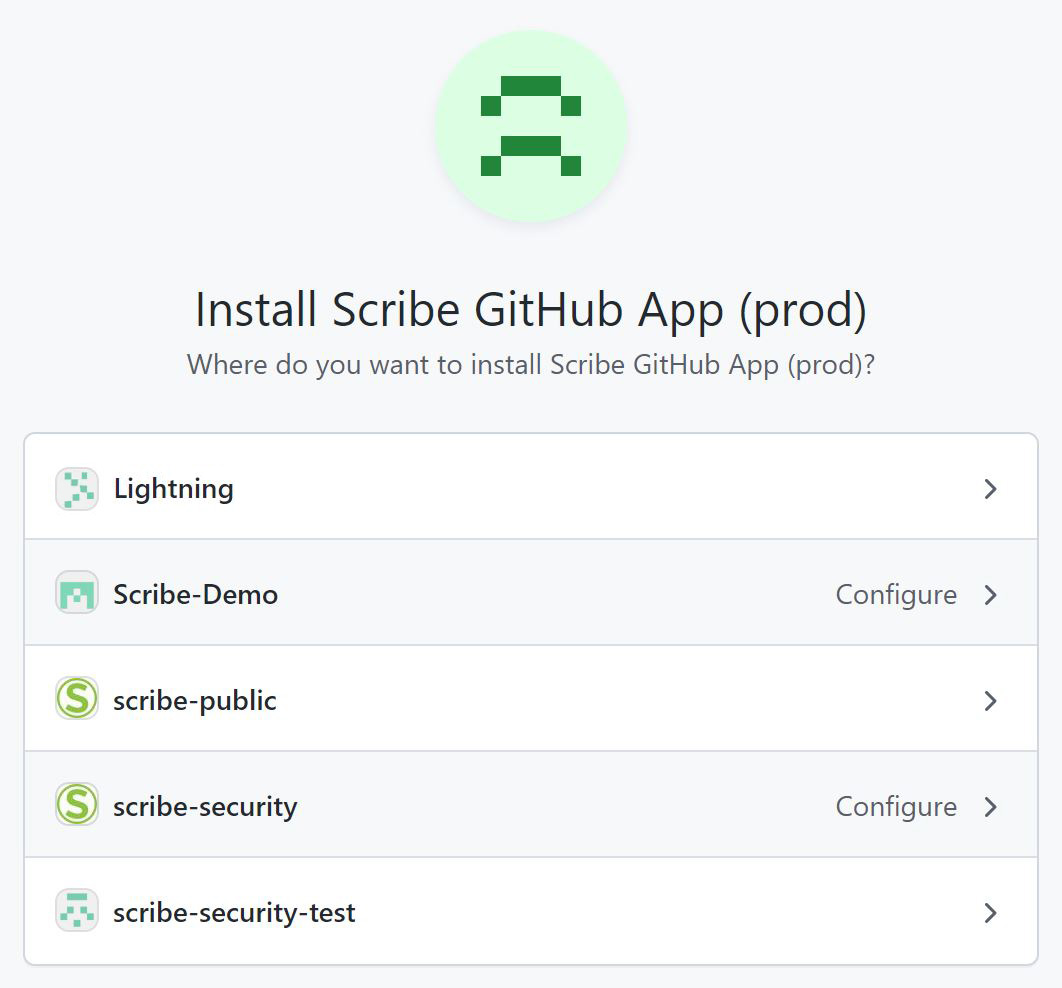
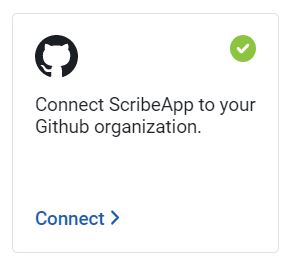
Choose the GitHub account you want to integrate the ScribeApp with. Make sure you have owner access to the account to allow the app integration. Make sure the account is organizational - the integration won't work with a private account.
Once you have chosen the account you wish to integrate with ScribeApp GitHub you will get the following window: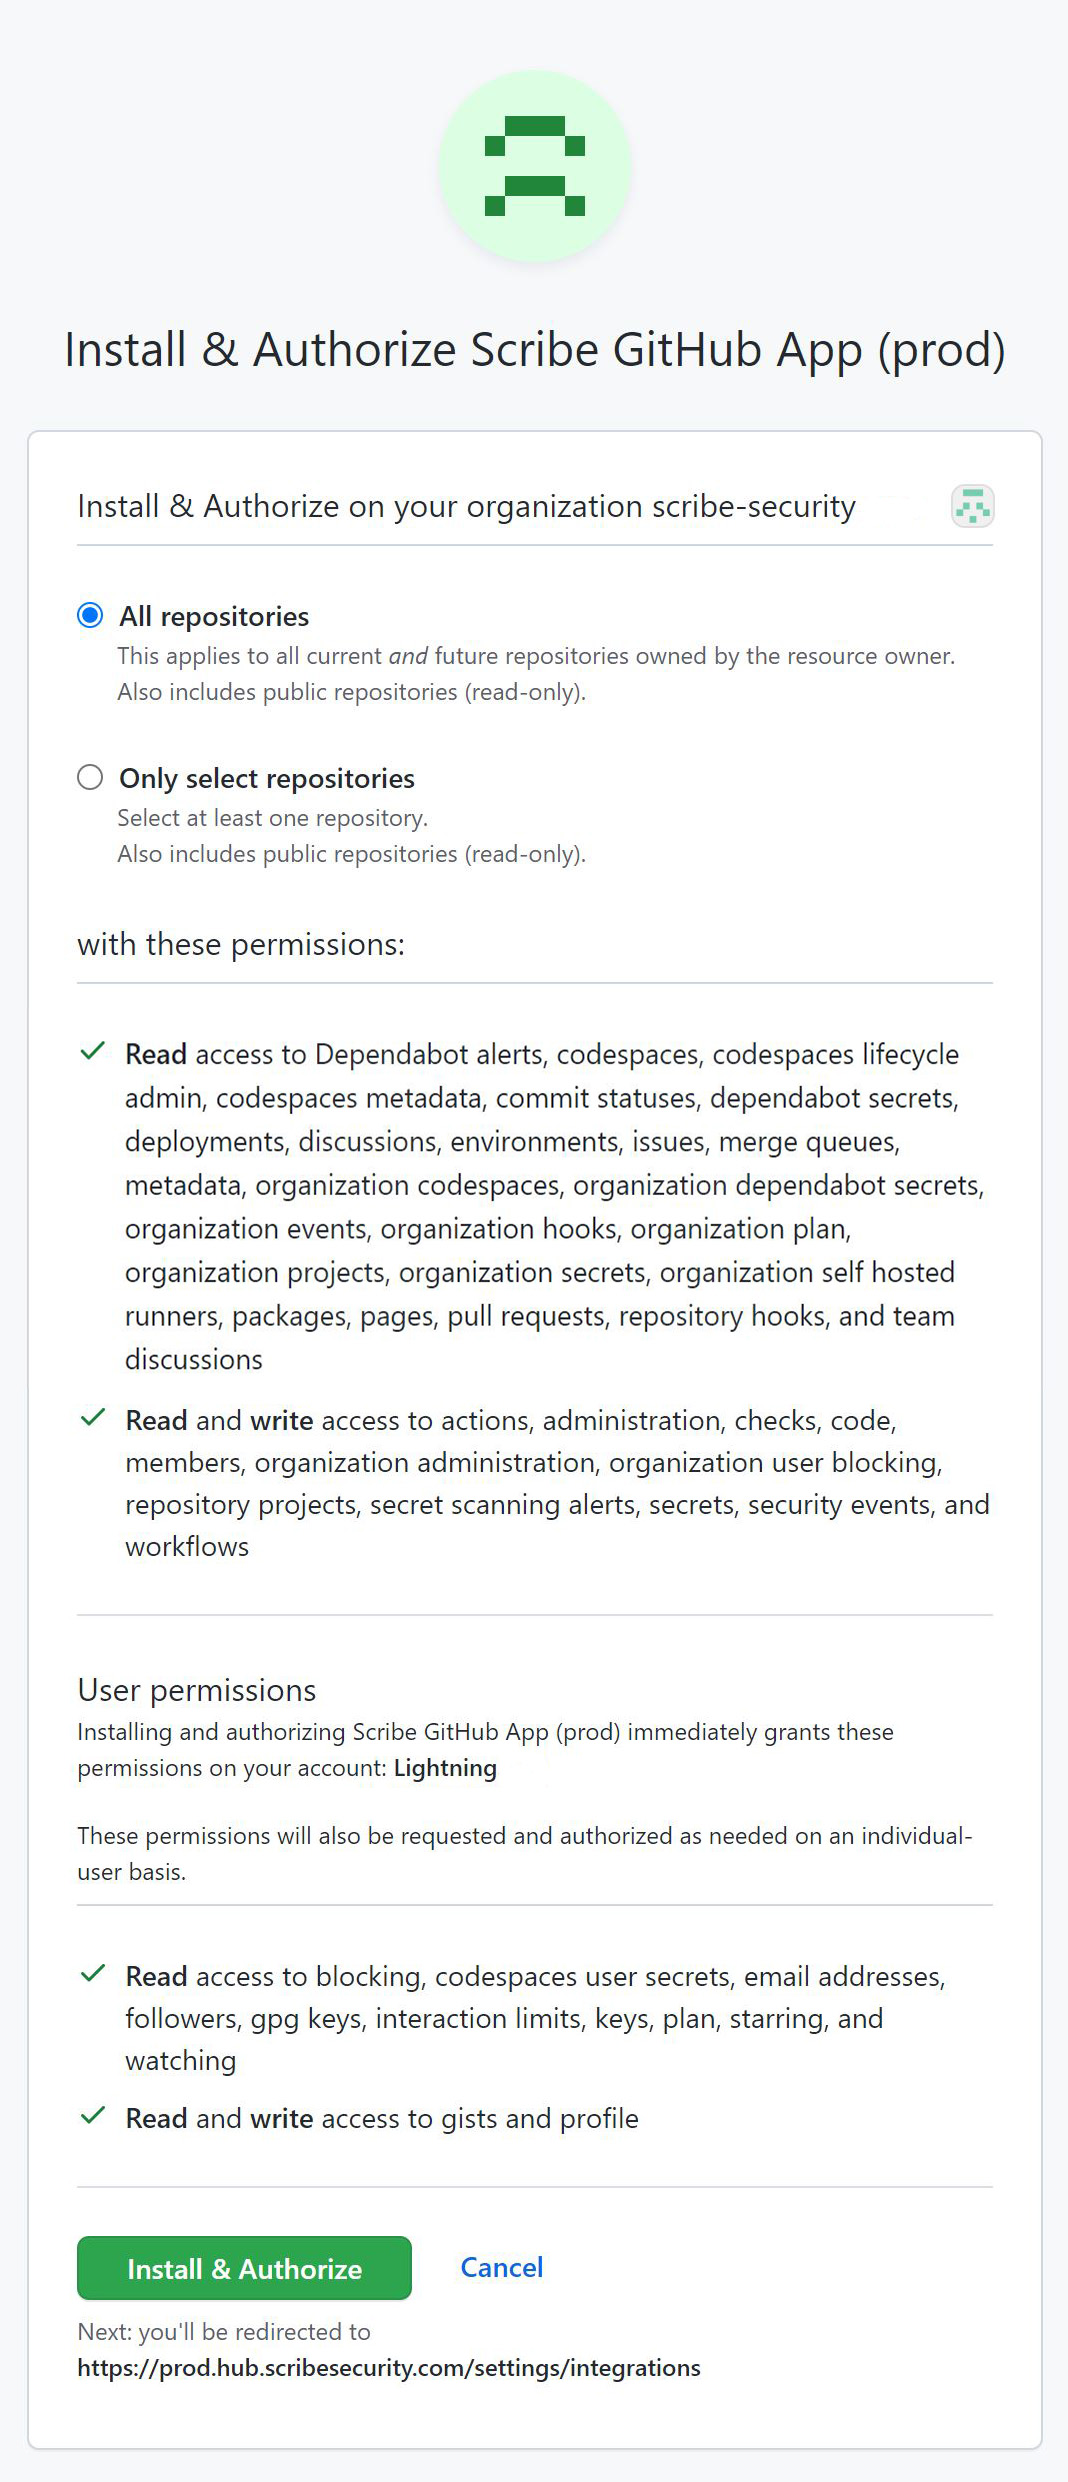
Choose the access level you wish to grant ScribeApp. You can choose to allow it access to all repositories or just select repositories. Note that repositories that are not covered by the ScribeApp will not be able to produce the SLSA provenance.
After reviewing the access granted to ScribeApp go ahead and approve it by pressing the big green button.
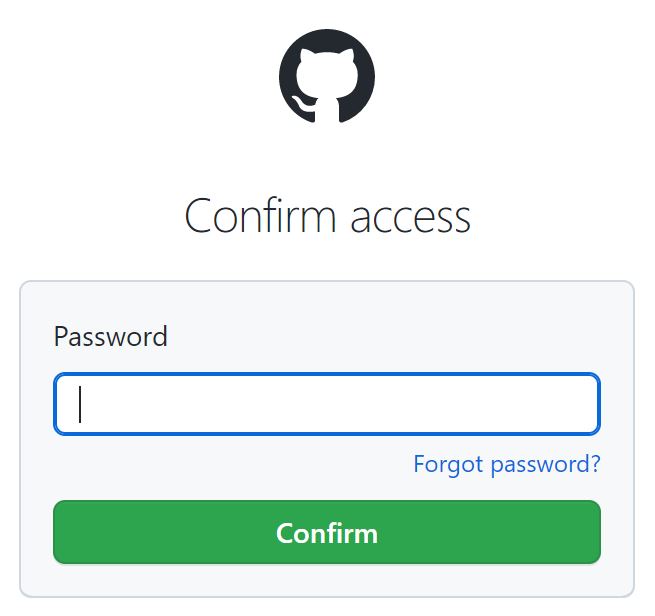
Next, you'll be directed to GitHub to approve your access by inputting your password.
You get redirected to the integrations page. There is now a green checkmark next to the GitHub icon in the Source Control section:
Now that you have connected the Scribe GitHub app to your organizational GitHub account you can add the SLSA provenance generation code snipet to the end of your build pipeline.
Here's the code you should add to your pipeline workflow YAML file after the final docker image is created:
    - name: Generate SLSA provenance statement
        id: valint_slsa_statement
        uses: scribe-security/action-bom@master
        with:
        target: 'docker:${{ github.repository }}:${{ github.sha }}'
        format: statement-slsa

        -uses: actions/upload-artifact@v4
         with:
            name: provenance
            path: ${{ steps.valint_slsa_statement.outputs.OUTPUT_PATH }}
And here's a full example pipeline:
name: Create signed git clone and image SBOMs
on: workflow_dispatch
jobs:
build:
runs-on: ubuntu-latest
permissions:
contents: read
packages: write
id-token: write
steps:
- uses: actions/checkout@v3
- name: Generate signed SBOM for repo content
# Used after git clone at the begining of the pipeline
uses: scribe-security/action-bom@master
with:
target: 'git:.'
components: packages,files,dep
scribe-client-secret: ${{ secrets.CLIENT_SECRET }}
format: attest
- name: Build the Docker image
# This is a stand in step for whatever needs to happen in your pipeline culminating with building a docker image from the repository
run: docker build . -t ${{ github.repository }}:${{ github.sha }}
- name: Generate signed SBOM for docker image
# Used after a docker image is built
uses: scribe-security/action-bom@master
with:
target: 'docker:${{ github.repository }}:${{ github.sha }}'
product-key: ${{ github.repository }}:${{ github.sha }}
scribe-client-secret: ${{ secrets.CLIENT_SECRET }}
format: attest
- name: Generate SLSA provenance statement
id: valint_slsa_statement
uses: scribe-security/action-bom@master
with:
target: 'docker:${{ github.repository }}:${{ github.sha }}'
format: statement-slsa
-uses: actions/upload-artifact@v4
with:
name: provenance
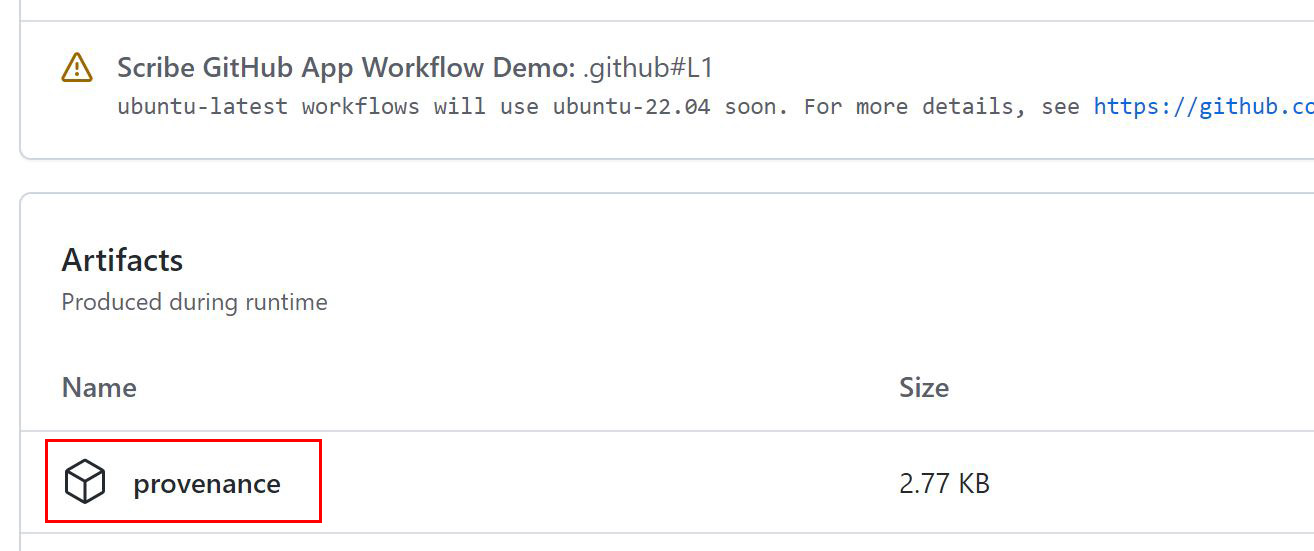
path: ${{ steps.valint_slsa_statement.outputs.OUTPUT_PATH }}To see that provenance information you need to go to the Actions tab in your GitHub repository.

There you can examine the workflows and actions you have run on this GitHub repository. Once you have run a workflow that includes the SLSA provenance generation you'll be able to find the resulting file at the bottom of the page:
The provenance information is in in-toto format and looks like this:

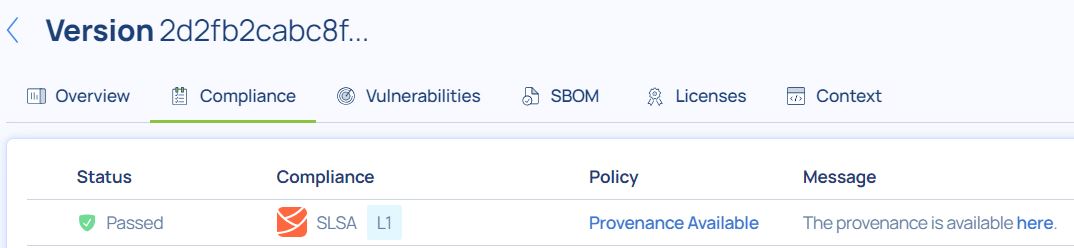
In your Scribe hub, having a SLSA provenance added can be seen in your compliance report:
-
-
To add your own policies to the pipeline check out this guide.
-
To capture 3rd party tool results in the pipeline and turn it into evidence, check out this guide.
Where to go on Scribe Hub
Now that you've created your first set of evidence you can log into your Scribe Hub to view the results.
The first place you can look into to make sure your evidence has been uploaded properly is the Evidence report. The evidence report shows all the evidence you have collected and uploaded to Scribe Hub from all your pipelines and projects.
To see more details on your pipeline you can check out the Product page
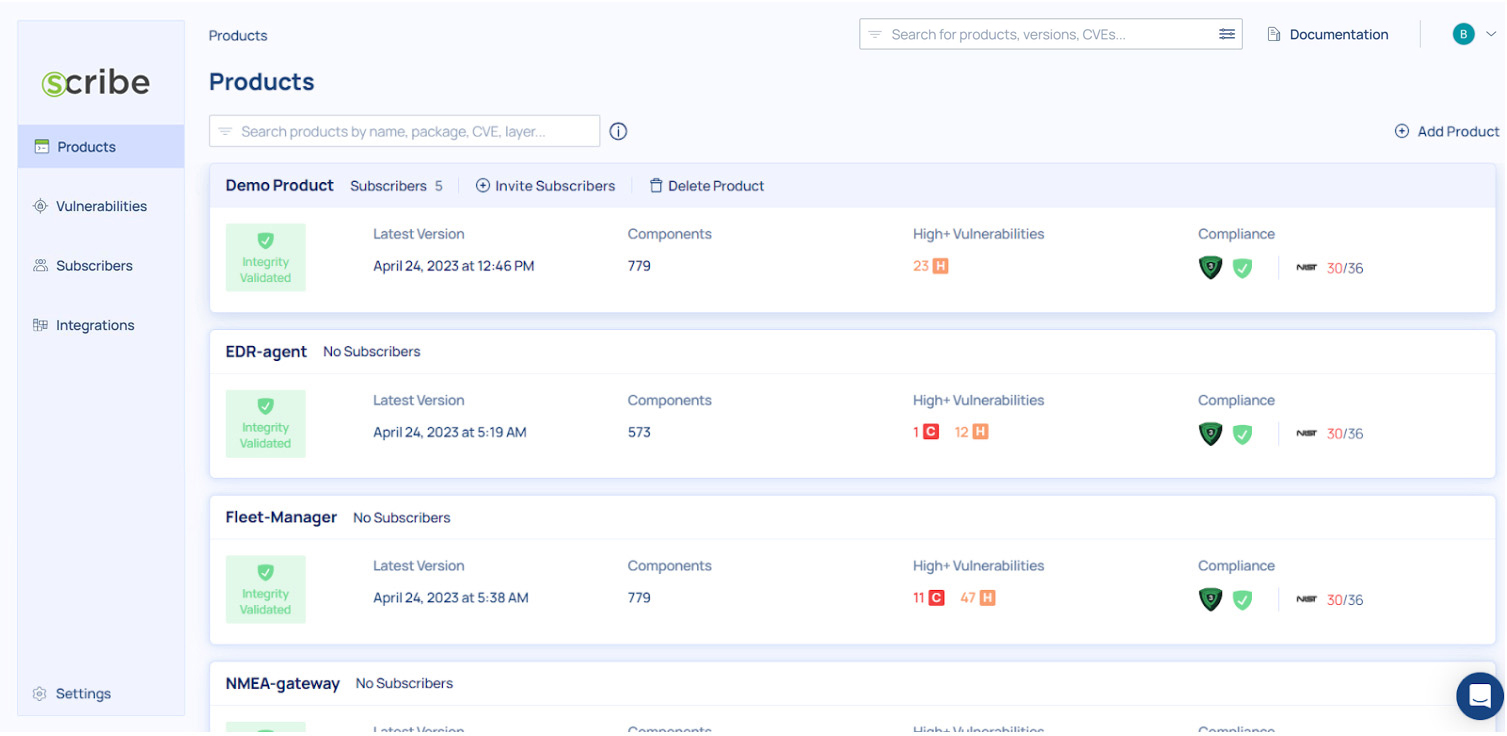
The products page shows you your products along with some basic information: How many subscribers have you added to this product, when the latest version of it was created (the last pipeline run), how many components were identified in the project, if the source code integrity was verified or not, how many high (or higher) vulnerabilities were identified, and how the project stands in terms of compliance to the SSDF and SLSA frameworks.
Clicking on a product will show you all the product's builds and their information:
For each build you can see its version ID, the build date, if the source code integrity was verified or not, the number and severity of vulnerabilities, how that build stands in terms of compliance, whether the build was published and if its signature was verified.
for more information on the pipeline you just completed, click on the last build uploaded (the top of the list) and you'll get to the build dashboard:
The dashboard is your main access to see this build's reports. You can see a summary of the build's compliance information to each of the frameworks, you can see a summary of the vulnerability information, and you can see the integrity validation information.
Where to go next
- To learn more about what you can see, learn, and access about your build and your product look at the reports guide section.
- To learn how to create and manage SBOMs and vulnerabilities go to this guide.
- To learn about Scribe's use of the SLSA framework go to this guide.
- To learn about enforcing SDLC policies go to this guide.
- To learn how to achieve SSDF compliance go to this guide.
- To learn how to secure your builds go to this guide.