Demo Project
Scribe sample project
This is a demo deployment of Scribe on a sample git project consisting of a source code repository and a simple CI pipeline implemented using Git workflows. Running the provided workflow will demonstrate how to use Scribe’s tools to generate signed evidence (AKA attestations) from 3 stages of the CI pipeline.
The evidence created will be uploaded to the Scribe Hub, and allow the platform to validate the integrity of the build, provide a detailed SBOM of the build, scan the build for vulnerabilities, and map the licenses of the software components used in the build. The only pre-requisite for running the demo is a personal GitHub account and a Scribe Hub account.
To run the demo perfoem the follwoing steps:
- Clone the demo repo to your GitHub account. This repo contains a simple npm ‘Hello-World’ app.
- Sign in to Scribe Hub. If you don't have an account you can sign up for free here.
- Create a API token in Scribe Hub > Settings > Tokens. Copy it to a safe temporary notepad until you complete the integration.
The token is a secret and will not be accessible from the UI after you finalize the token generation.
-
Create a new secret in your cloned repo for the Scribe Hub API token.
-
On GitHub, go to the main page of the repository.
-
Under your repository name, click
Settings. If you cannot see theSettingstab, select the dropdown menu, then clickSettings.
-
In the
Securitysection of the sidebar, selectSecrets and variables, then clickActions. -
At the top of the page, click
New repository secret. -
Type 'SCRIBE_TOKEN' as name for your secret in the
Nameinput box. -
Enter the value for your token.
-
Click
Add secret.
-
-
You can now run a workflow to create an attestation of the last version committed and pushed to Git. This attestation represents the 'source of truth' regarding the project's source code. Once you have created and stored this attestation it is quite difficult for a potential adversary to tamper with the code anywhere down the pipeline. In the demo project page, go to Actions.
Click ‘I understand my workflows, go ahead and enable them’.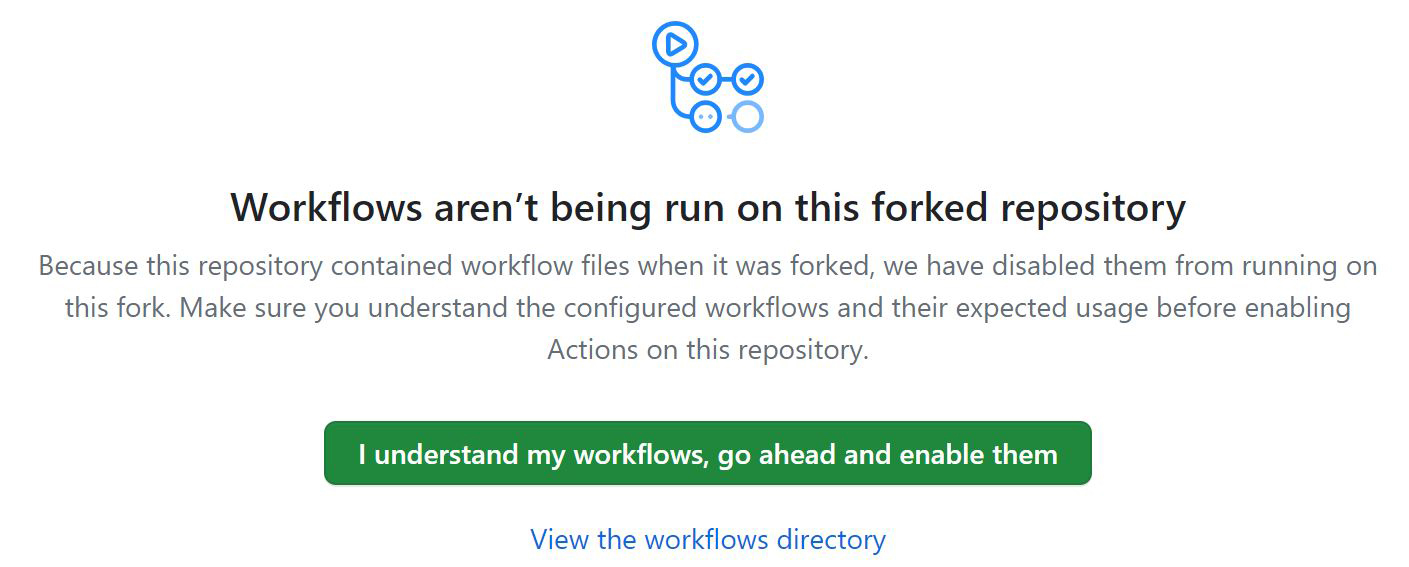
You will be redirected to the 'Actions' tab:
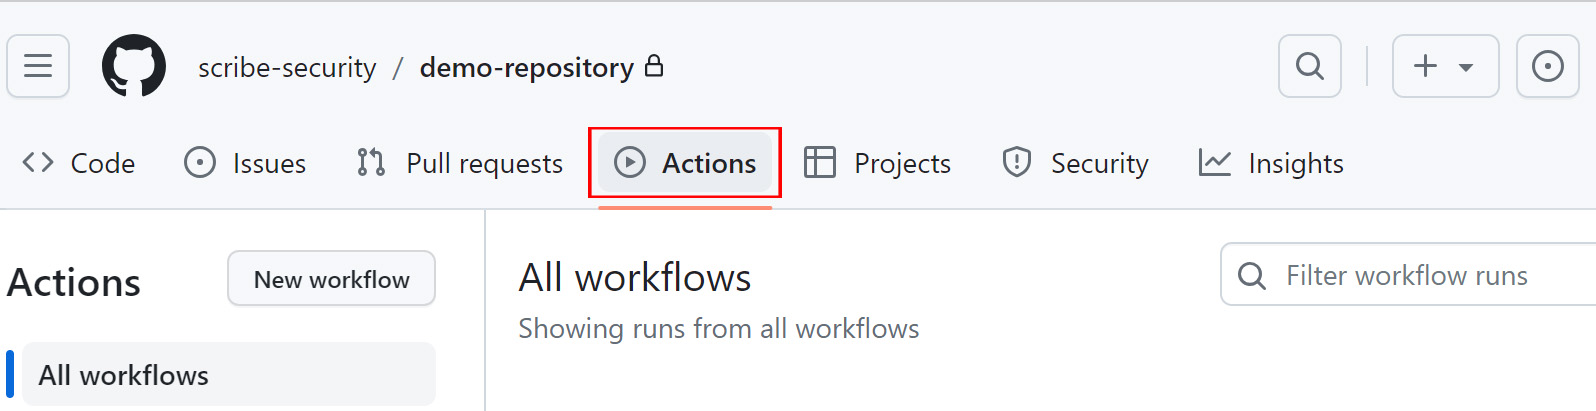
From the actions available on the left panel select Create signed git commit sbom and click Run workflow. Once the workflow finished executing, a signed attestation (an SBOM) has been generated and automatically uploaded to your Scribe Hub account.
-
At this point you can run the build pipeline - build the project and containerize it. You can do this by running the
Create signed git clone and signed image SBOMsworkflow. As the name suggests, this workflow will generate a signed SBOM of the git repo cloned into the pipeline and another signed SBOM of the final built docker image.Both attestations will be uploaded to your Scribe Hub account. Now you can view the project details on the Scribe Hub products page of your Scribe Hub account.
Quick tour of the Scribe Hub
The first page you see when you log into your Scribe Hub is your Products page.
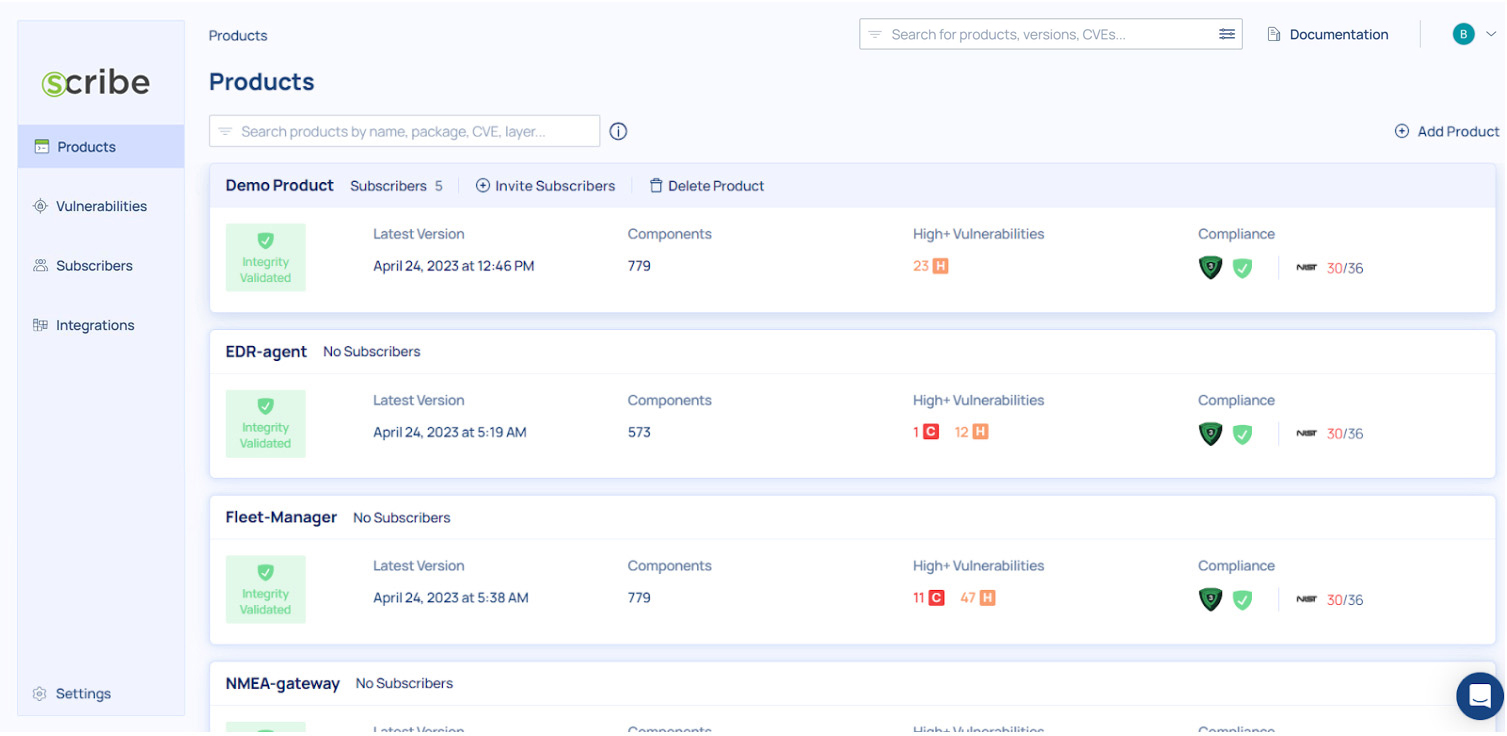
You will see a demo project. Since you have just run the sample project's workflows, running a pipeline, generating evidence, and uploading it to Scribe Hub, you'll see your new project under the default demo project.
The Products page shows you your products along with some basic information: How many subscribers have you added to this product, when the latest version of it was created (the last pipeline run), how many components were identified in the project, if the source code integrity was verified or not, how many high (or higher) vulnerabilities were identified, and how the project stands in terms of compliance to the SSDF and SLSA frameworks.
Clicking on a product will show you all the product's builds and their information:
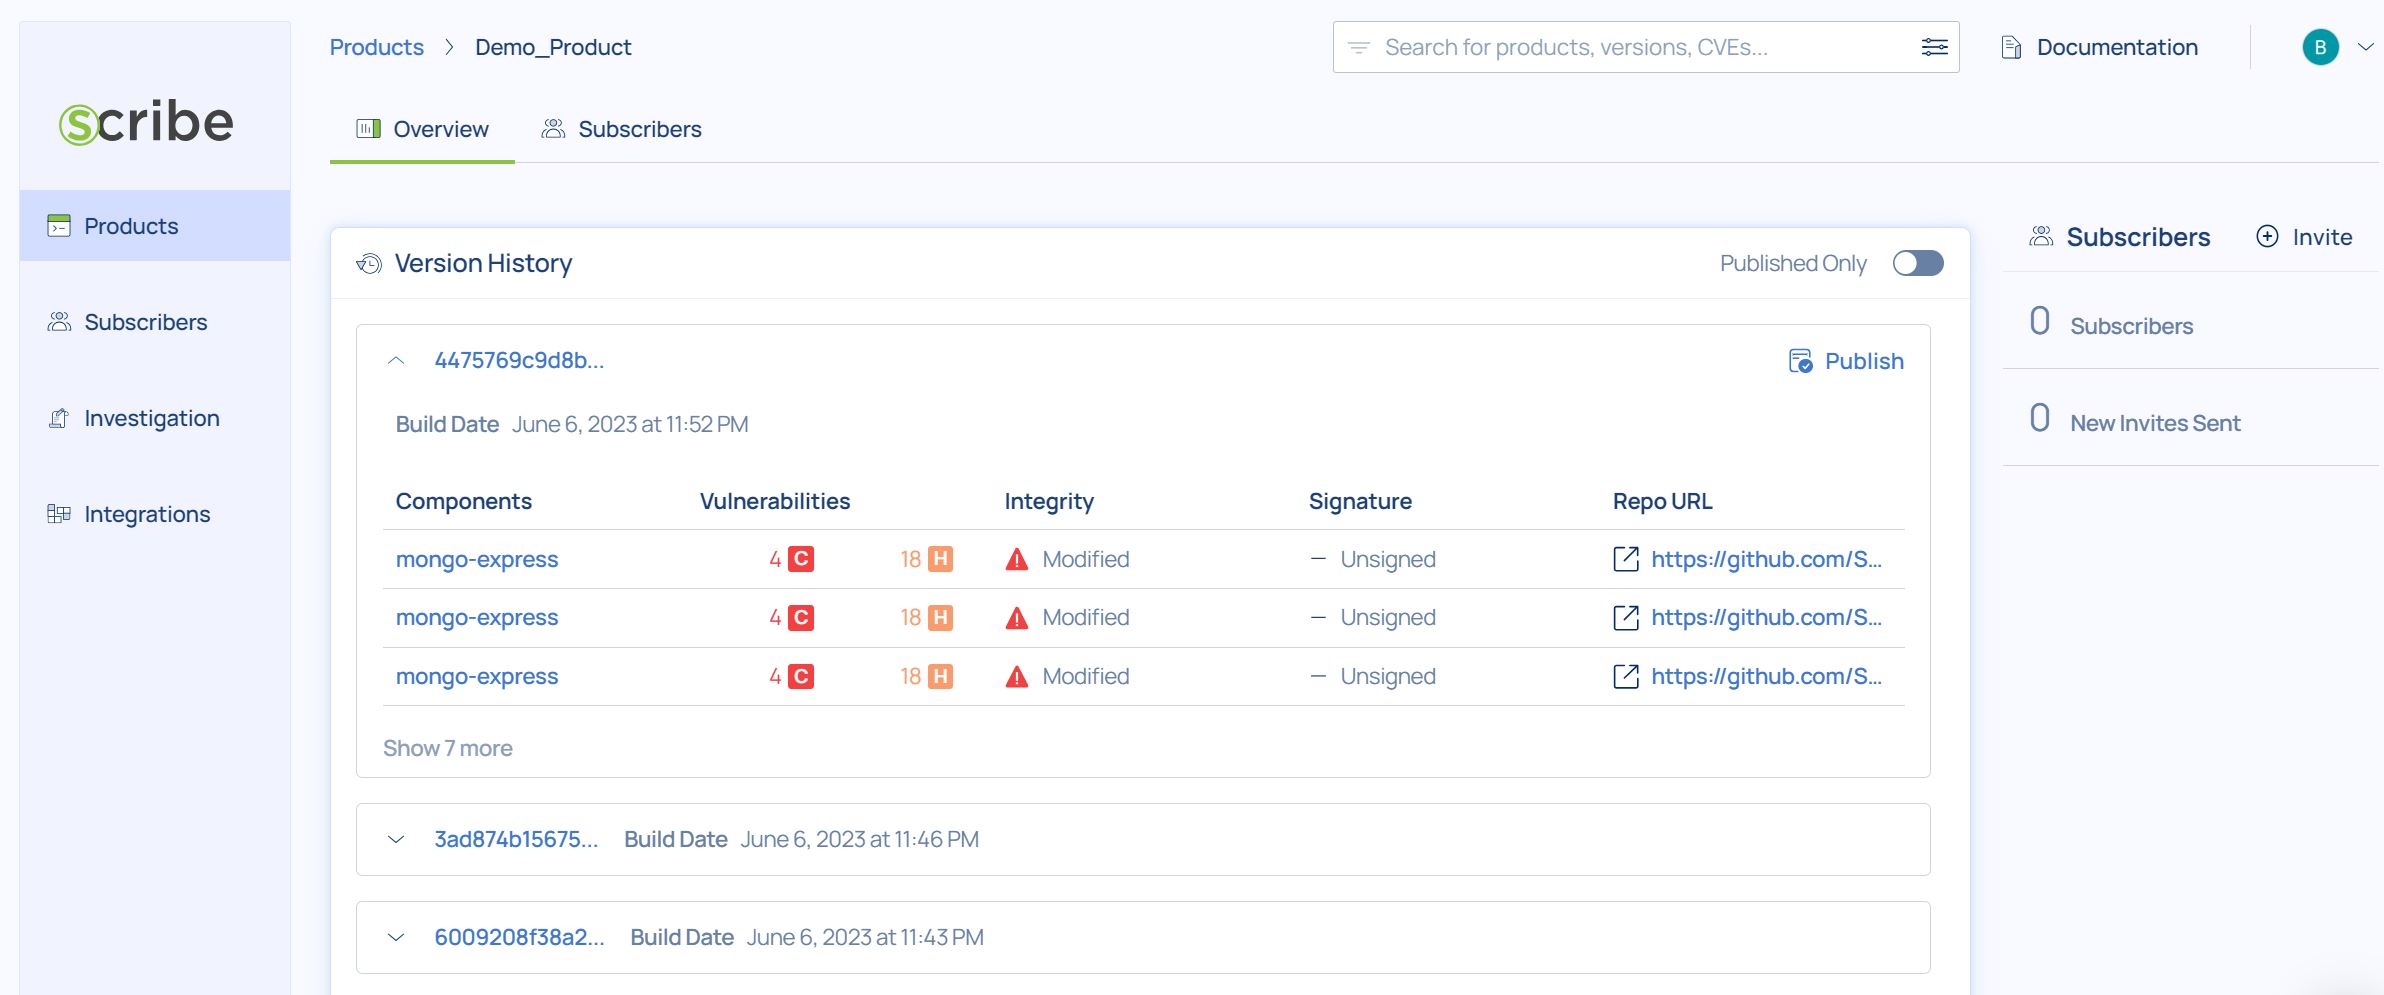
For each build you can see its version ID, the build date, if the source code integrity was verified or not, the number and severity of vulnerabilities, how that build stands in terms of compliance, whether the build was published and if its signature was verified.
for more information click on any of the builds and you'll get to the build dashboard:
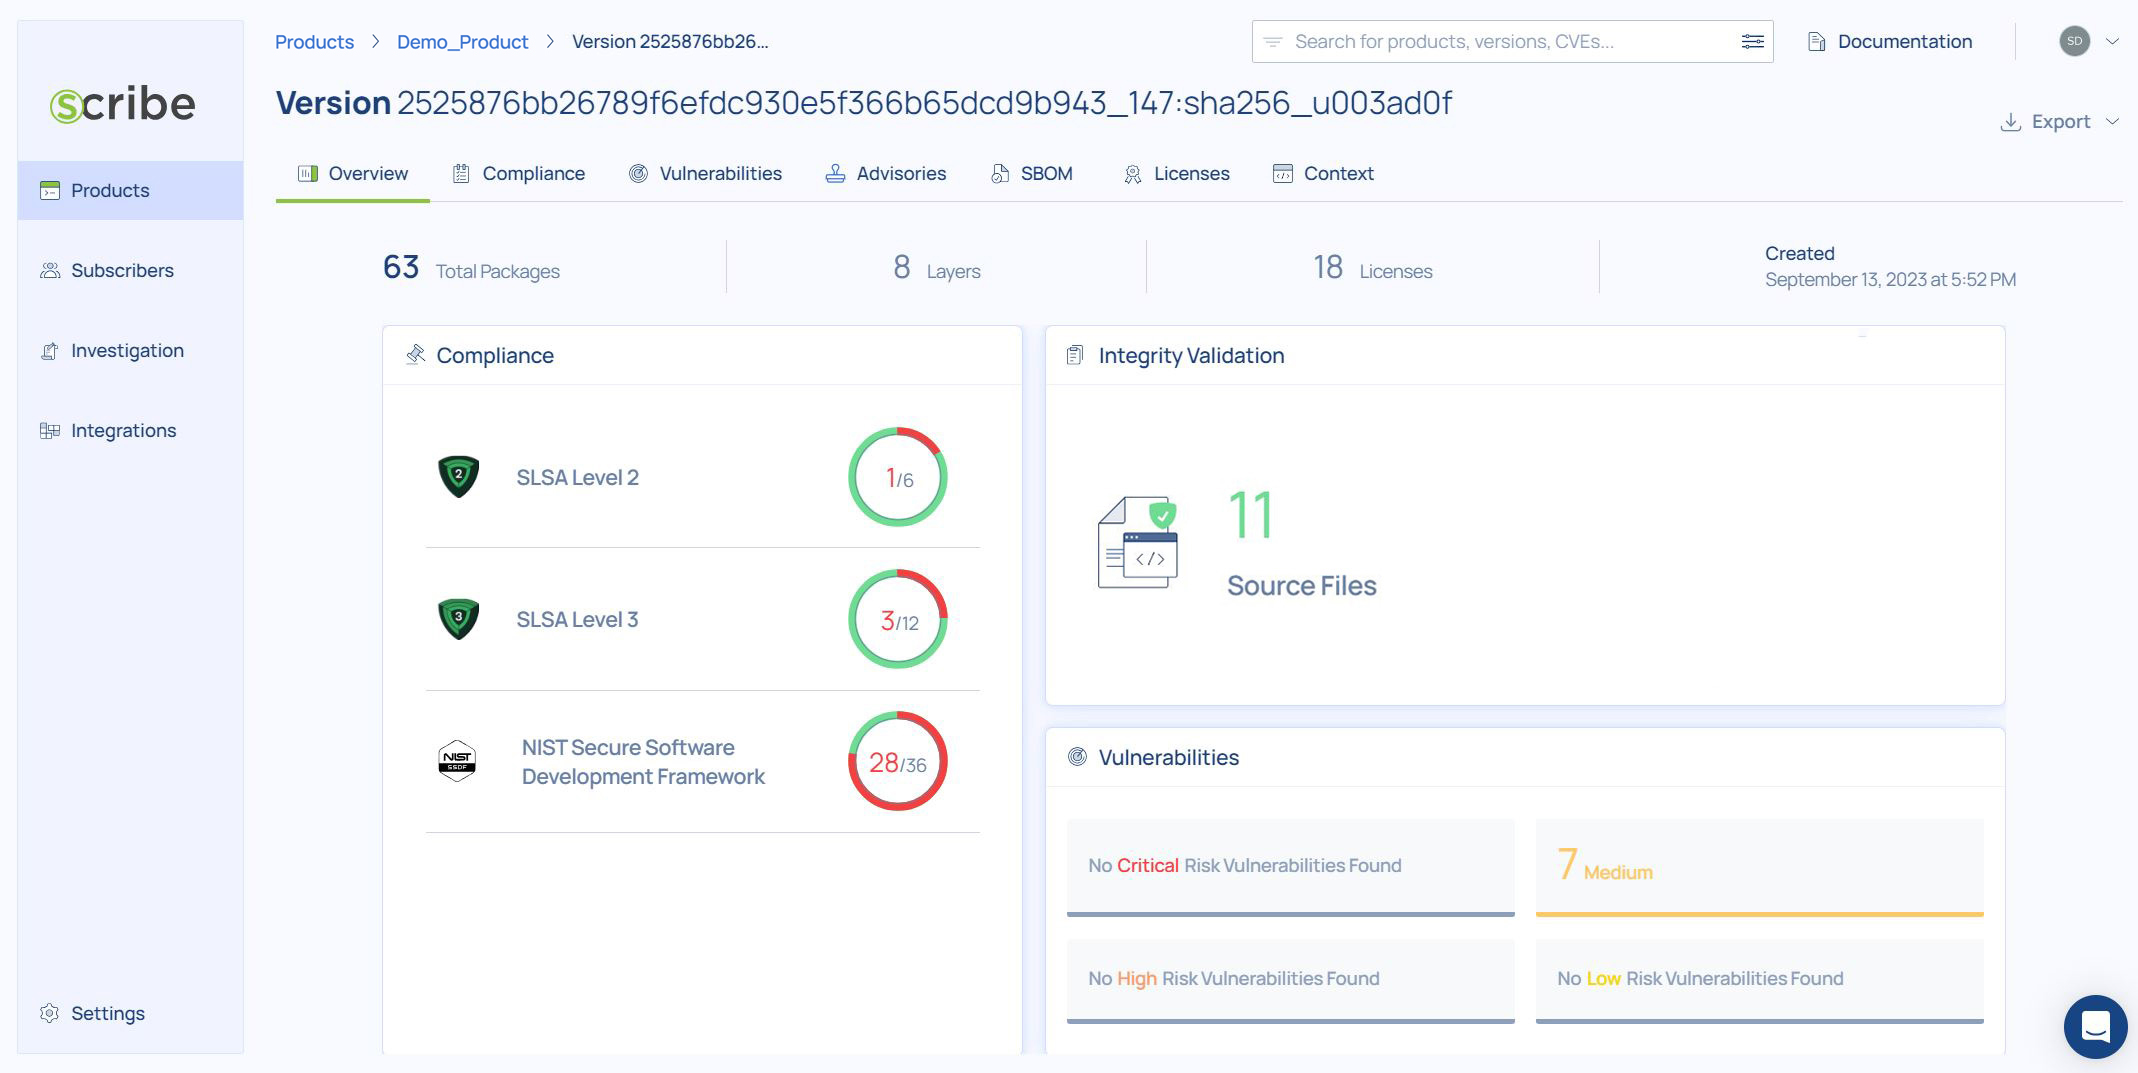
The dashboard is your main access to see this build's reports. You can see a summary of the build's compliance information to each of the frameworks, you can see a summary of the vulnerability information, and you can see the integrity validation information.
Where to go next
- To learn more about what you can see, learn, and access about your build and your product look at the reports guide section.
- To learn how to create and manage SBOMs and vulnerabilities go to this guide.
- To learn about Scribe's use of the SLSA framework go to this guide.
- To learn about enforcing SDLC policies go to this guide.
- To learn how to achieve SSDF compliance go to this guide.
- To learn how to secure your builds go to this guide.