Valint Gatekeeper Provider
Valint Gatekeeper Provider seamlessly integrates with OPA Gatekeeper's ExternalData feature to facilitate policy verification within your supply chain. This integration enables you to enforce a variety of supply chain policies, including signed image verification and various SDLC (Software Development Life Cycle) initiatives.
The Valint Gatekeeper Provider offers a means to enforce or generate alerts for any violations or successful initiative evaluations based on evidence collected from the supply chain, whether signed or unsigned (or any combination thereof).
Policy As Code
Our policies, expressed in code, offer extensive customization options and can be tailored to suit specific needs.
For more detailed information, please visit our page on Applying Initiatives to your SDLC or refer to our initiatives reference guide.
Additionally, you have the option to reference or fork our default policy bundle repository.
Use Cases Examples
| Use Case | Description |
|---|---|
| Enforcing Image Signing | Ensure that all images deployed to the production environment are signed and have a matching CycloneDX SBOM. |
| Enforcing Build pipeline vulnerability scanner | Verify that the image build pipeline executes a vulnerability scanner with no critical CVEs. |
| Enforcing image built by CI | Verify that images are built using continuous integration (CI) processes. |
| Enforcing SLSA Level 2 | Verify that images are built using CI and produce signed SLSA provenance. |
| Restricted Builder Dependency Management | Restrict the use of banned builder dependencies during the build process. |
| Continuous Compliance Monitoring | Monitor compliance with branch protection rules and push rules in Git repositories. |
| Vulnerability Assessment for Infrastructure | Detect misconfigurations or vulnerabilities in Kubernetes clusters or Docker images. |
| License Compliance Enforcement | Ensure that software artifacts comply with licensing policies and do not include banned licenses. |
| Deployment Environment Validation | Validate that deployment environments meet specified security and configuration standards. |
| Rollout Verification | Verify that deployments adhere to rollout strategies and policies, such as canary or blue-green deployments. |
| Dependency Version Control | Control the versioning and usage of dependencies in deployed applications to prevent security risks. |
| Configuration Consistency | Ensure consistency in configuration settings across deployed instances to prevent misconfigurations. |
| Resource Utilization Management | Monitor and manage resource usage during deployment to optimize performance and cost-effectiveness. |
Installation
Step 1: Installing Gatekeeper
- Deploy Gatekeeper with external data enabled (
--enable-external-data)
helm repo add gatekeeper https://open-policy-agent.github.io/gatekeeper/charts
helm repo update
helm install gatekeeper/gatekeeper  \
    --name-template=gatekeeper \
    --namespace gatekeeper-system --create-namespace \
    --set enableExternalData=true \
    --set controllerManager.dnsPolicy=ClusterFirst,audit.dnsPolicy=ClusterFirst \
    --set validatingWebhookTimeoutSeconds=30
Notice
enableExternalDatais set as true.
Ensure that the version you have is newer than
3.15.0.
Step 2: Pull Valint Gatekeeper helm Repo
Pull valint gatekeeper Helm chart
helm repo add scribe https://scribe-security.github.io/gatekeeper-valint
helm repo update
Step 3: Generate TLS certificate and key for the provider
Gatekeeper enforces TLS when communicating with the provider, so certificates must be provided. For more details see Gatekeepers TLS support.
- To generate new certificates, use may use the quick-start
generate-tls-certscript:
curl -sSfL https://raw.githubusercontent.com/scribe-security/gatekeeper-valint/main/scripts/generate-tls-cert.sh | bash
- This will create CA and certificate files in
certsdirectory.
Step 4: Installing Provider with Scribe Evidence store
Scribe evidence store allows you store evidence using scribe Service.
Alternatively, you can explore the OCI-supported alternative evidence stores.
Before you begin
Integrating Scribe Hub with admission controller requires the following credentials that are found in the Integrations page. (In your Scribe Hub go to integrations)
- Client Secret
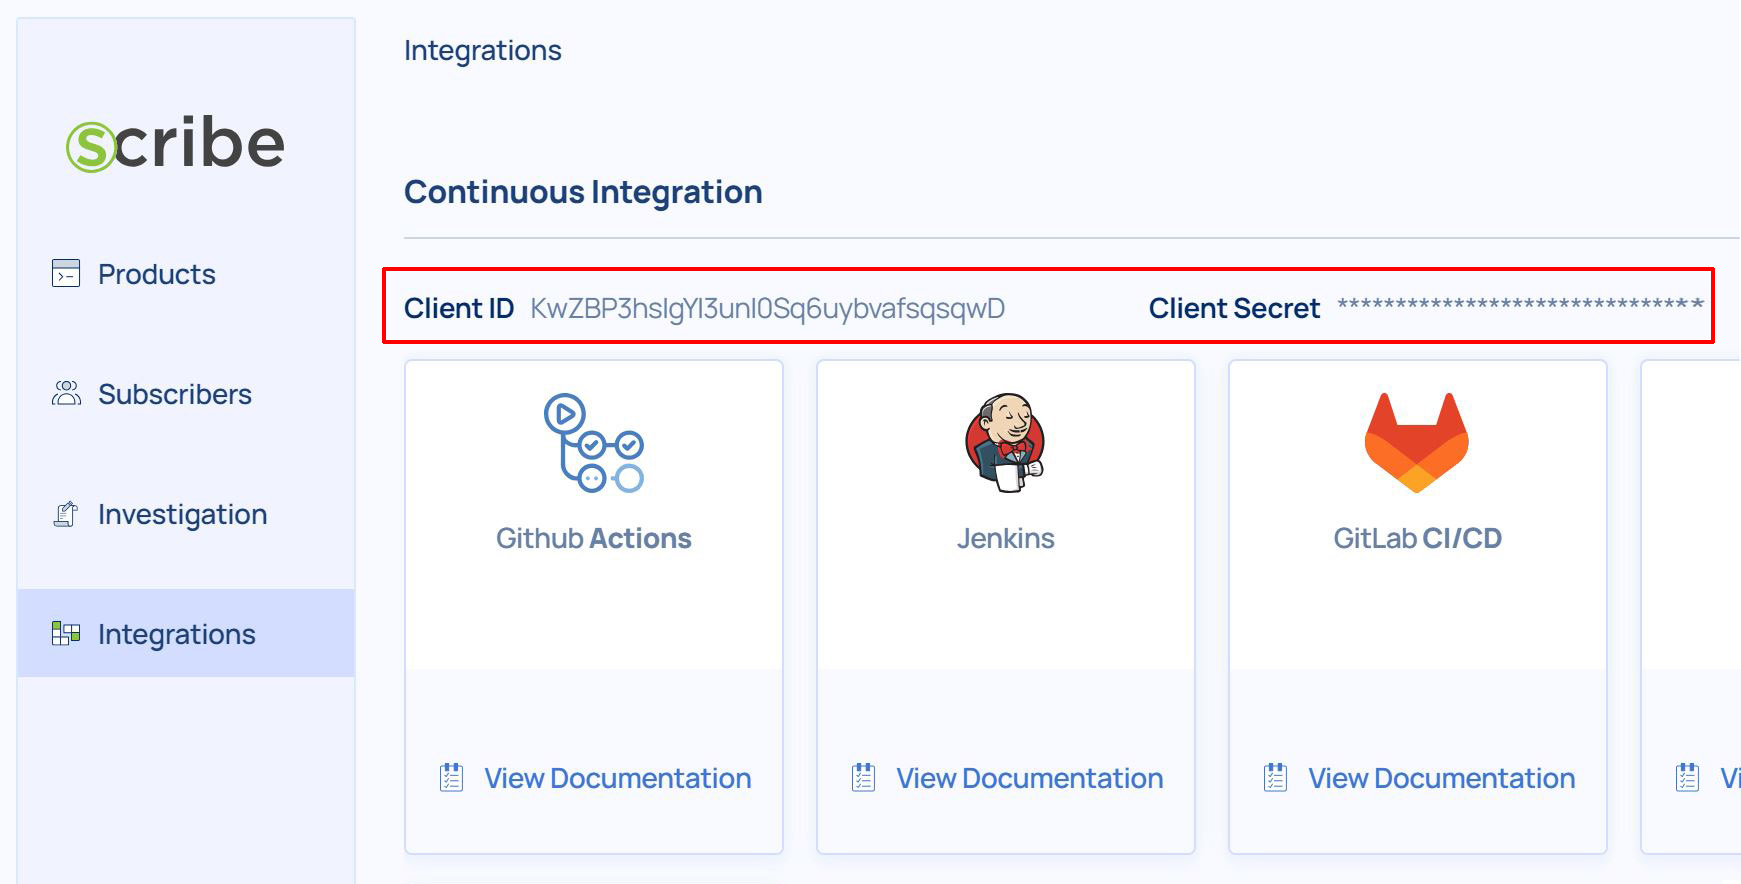
Enable Scribe client and add related Client Secret.
helm install scribe/gatekeeper-valint --name-template=gatekeeper-valint \
  --namespace gatekeeper-valint --create-namespace \
  --set certs.caBundle=$(cat certs/ca.crt | base64 | tr -d '\n') \
  --set certs.tlsCrt="$(cat certs/tls.crt)" \
  --set certs.tlsKey="$(cat certs/tls.key)" \
  --set scribe.client_secret=$SCRIBE_TOKEN
Credentials will be stored as a secret named
valint-scribe-cred-secret.
Tls cert and key are stored as a secret named
gatekeeper-valint-certs
Verifying signed evidence
By default, the verification uses Sigstore Keyless signatures. However, you have the option to switch to X509 certificates if needed.
In your policies you then can set what rules should be verified over signed evidence by setting the signed field.
- uses: <some_rule>
  with:
   signed: true
Signing evidence
You can sign image SBOMs or any other type of evidence using Valint. For more information see attestation page.
X509-based Signatures
To enable the provider to verify X509-based signatures, follow these steps:
- Set the
x509.cafield to specify the CA chain to verify against. - Set the
valint.attest.defaultto default tox509-env.
For example, to perform an upgrade with X509-based verification:
helm upgrade gatekeeper-valint scribe/gatekeeper-valint \
  --namespace gatekeeper-valint \
  --reuse-values --force \
  --set valint.attest.default=x509-env \
  --set x509.ca="$(cat certs/evidence.crt)"
Certificate is mapped to
valint-x509-secretsecret.
Please replace the
evidence.keyandevidence.crtgenerated by ourscripts/generate-tls-cert.shwith your own organization's trusted CA.
signing with valint
# Signing a image
valint <bom, slsa> <target> -o attest --attest.default <x509,x509-env> \
    --key <key path/env/url> \
    --cert <cert path/env/url> \
    --ca <ca-chain path/env/url> [FLAGS]

# Signing third party evidence
valint evidence som_evidence.json -o attest --attest.default <x509,x509-env> \
    --key <key path/env/url> \
    --cert <cert path/env/url> \
    --ca <ca-chain path/env/url> [FLAGS]

# Verifying a image
valint verify <target> -i <attest, attest-slsa, attest-generic> --attest.default <x509,x509-env> \
    --ca <cert path/env/url> \
    --crl <crl path/env/url>  [FLAGS]
For more information see attestation page.
Sigstore Keyless Signatures
To enable the provider to verify Sigstore Keyless signatures, set the valint.attest.default field to default to sigstore.
For example, to perform an upgrade with sigstore-based verification:
helm upgrade gatekeeper-valint scribe/gatekeeper-valint \
  --namespace gatekeeper-valint \
  --reuse-values --force \
  --set valint.attest.default=sigstore
signing with valint
# Signing a image
valint <bom, slsa> <target> -o attest [FLAGS]

# Signing third party evidence
valint evidence som_evidence.json -o attest [FLAGS]

# Verifying a image
valint verify <target> -i <attest, attest-slsa, attest-generic> [FLAGS]
For more information see attestation page.
Demo: Enforcing Image Sigstore Signing Policies Over Scribe store
To showcase the enforcement of image signing policies using Gatekeeper Valint, we'll apply a simplistic unsigned image error policy and upgrade our gate accordingly.
Upgrade your gate with the following command,
helm upgrade gatekeeper-valint scribe/gatekeeper-valint \
  --values signed_image_policy.yaml \
  --namespace gatekeeper-valint \
  --reuse-values --force
signed_image_policy.yaml file
select:
  gate-name: signed_images_gate
  gate-type: admission
  apply:
  - namespace: "" # Any
    glob:
    - "my_company/**"
    filter-by:
    - target
    initiative:
      config-type: initiative
      id: admission_initiative
      name: Signed Images initiative
      controls:
      - name: require_signed_images
        id: signed_images
        rules:
        - name: error_on_unsigned_image
          uses: sbom/artifact-signed@v2
          level: error
In the provided signed_image_policy.yaml, we specify a policy to enforce signature verification for images admitted from the my_company Dockerhub account.
Now lets try and apply deployments before signing the image.
kubectl apply -f signed-deployment.yaml 2>&1 | echo -e "$(cat -)"
signed-deployment.yaml file
apiVersion: apps/v1
kind: Deployment
metadata:
  name: signed-deployment
  labels:
    app: signed-deployment
spec:
  replicas: 0 # testing purposes only
  selector:
    matchLabels:
      app: signed-deployment
  template:
    metadata:
      labels:
        app: signed-deployment
    spec:
      containers:
      - name: valid
        image: my_company/signed:latest
In the output, you should see a rejected admission error due to the unsigned image SBOM.
Error from server (Forbidden): error when creating "policy/examples/signed-deployment.yaml": admission webhook "validation.gatekeeper.sh" denied the request: [gatekeeper-valint] image not accepted: {"errors": [], "responses": [], "status_code": 200, "system_error": "
Scribe Admission refused 'scribesecurity/signed:latest' deployment to 'default'.

- policy check failed, Policies [require_signed_images] failed with the following errors.
* rule [error_on_unsigned_image] failed resource not found, no evidence found
"}
To resolve this, sign your image SBOM using the Valint tool:
valint bom my_company/signed:latest -o attest --product-key scribesecurity/signed:latest [FLAGS]
Then, re-apply the deployment:
kubectl apply -f signed-deployment.yaml
Upon successful deployment, you'll see a detailed evaluation summary in the admission logs, providing insights into the policy checks performed and their outcomes.
[2024-03-11 10:05:27] INFO Target 'my_company/signed:latest' results
[2024-03-11 10:05:27] INFO Policy "require_signed_images" Evaluation Summary:
┌────────────────────────────────────────────────────────────────────────────────────────────────────────────────────────────┐
│ Policy "require_signed_images" Evaluation Summary │
├─────────────────────────┬────────┬──────────────────�──────┬───────────────────┬────────────────────────────────────────────┤
│ RULE NAME │ SIGNED │ SIGNATURE VERIFICATION │ POLICY EVALUATION │ COMMENT │
├─────────────────────────┼────────┼────────────────────────┼───────────────────┼────────────────────────────────────────────┤
│ error_on_unsigned_image │ true │ passed │ │ 1/1 evidence origin and signature verified │
├─────────────────────────┼────────┼────────────────────────┼───────────────────┼────────────────────────────────────────────┤
│ AGGREGATE POLICY RESULT │ │ │ PASSED │ │
└─────────────────────────┴────────┴��────────────────────────┴───────────────────┴────────────────────────────────────────────┘
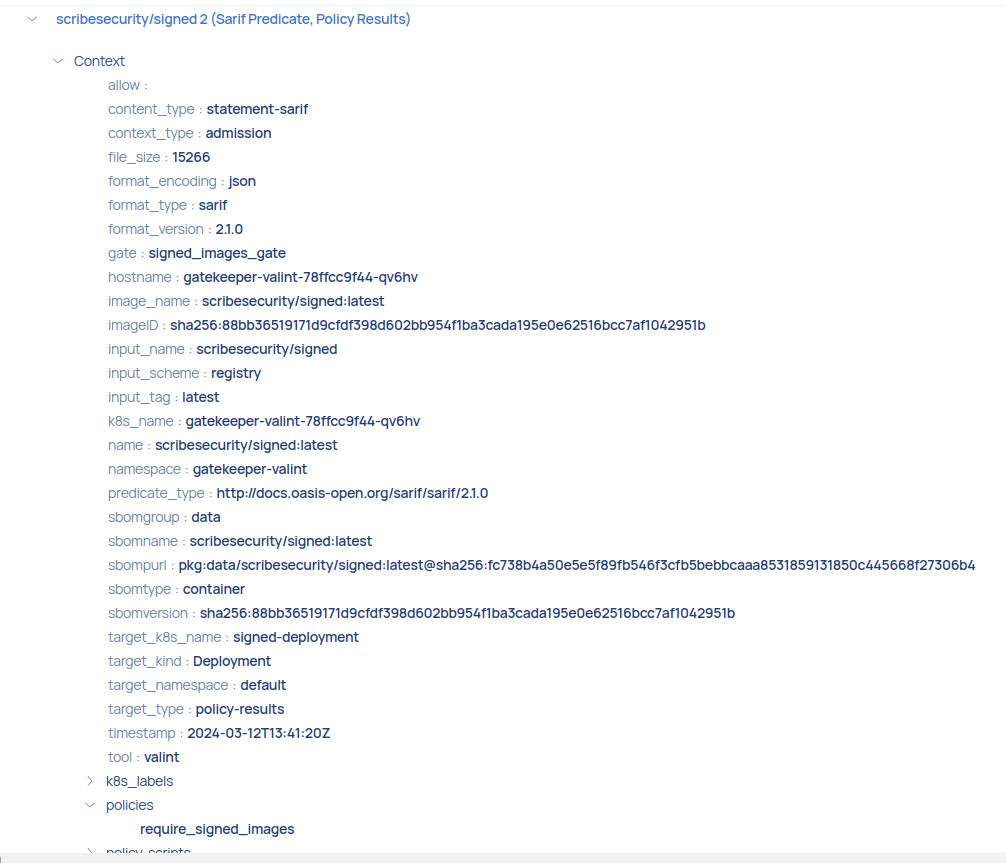
Finally, if you consult the management console, you'll be able to view both the unsuccessful and successful outcomes of the policy.

Policy Result Context
Policy Gate
The Gate Policies in Valint Gatekeeper Provider allow for fine-grained control over policy evaluation for images admitted into the system.
Gate Configuration options
select:
  gate-name: default_gate # Required
  gate-type: admission
  apply:
  - namespace: <string> # Optional
    glob: <string> # Optional
    filter-by: <string> # Optional
    product-key: <string> # Optional
    initiative: <object> # Optional # inline definition
    initiative-ref: <string> # Optional   # e.g. sp-800-190@v2
gate: Specifies the gate name.apply: list of policies to applynamespace: Specifies the namespace to which the policy should apply to.glob: Defines the image reference pattern to which the policy is applied to.product-keyProduct key under which evidence will be stored.product-version: Product version under which evidence will be stored.filter-by: Determines the scope of the policy evaluation. Supported options include:target: Evaluate policies scoped by the admission imageID.pipeline: Evaluate policies scoped by the image build pipeline.product: Evaluate policies scoped by a specific product.
policy: Set policy to evaluate, for more details see enforcing SDLC policies or refer to our policy reference guide.initiative-ref: Set initiative reference to evaluate for example sp-800-190@v2.initiative: Custom initiative to evaluate on, see initiatives reference guide for more details
policy gate configuration are mapped to a configmap named
gatekeeper-valint-policies.
Defining Namespace for Gatekeeper Constraints
Setting Gatekeeper Constraints Namespace
To set the namespace for gatekeeper constraints, please configure the set constraint.namespace fields. The distinction from setting the policy gate namespace is that API calls will only be triggered for constraint.namespace.
For example, to perform an upgrade to your policy gate:
helm upgrade gatekeeper-valint scribe/gatekeeper-valint \
  --set constraint.namespace=my_namespace \
  --namespace gatekeeper-valint \
  --reuse-values --force
Updating Your Policy Gate
For example, to perform an upgrade to your policy gate:
helm upgrade gatekeeper-valint scribe/gatekeeper-valint \
  --values my_gate.yaml \
  --namespace gatekeeper-valint \
  --reuse-values --force
In the my_gate.yaml file, you can specify policy rules like this:
select:
  gate-name: my_gate
  gate-type: admission
  apply:
  - namespace: "some_namespace"
    glob:
    - "**"
    filter-by:
    - target
    initiative:
      config-type: initiative
      id: admission_initiative
      name: Fresh Images Initiative
      controls:
      - name: fresh Image control
        id: fresh-image
        rules:
        - name: fresh-image
          uses: images/fresh-image@v2
          level: warning
          with:
            max_days: 356
Filter-By Options
The filter-by field allows you to specify the scope of the policy evaluation. Below are the available options:
Target Evaluation
Option available for both
scribeandOCIstores.
The target option evaluates policies based on the imageID for admission. This allows you to run policies directly on the images themselves.
select:
  gate-name: image_gate
  gate-type: admission
  apply:
  - namespace: ""
    glob:
    - "**"
    filter-by:
    - target
    initiative:
      config-type: initiative
      id: admission_initiative
      name: Fresh Images Initiative
      controls:
      - name: require_fresh_images
        id: fresh-image
        rules:
        - name: fresh-image
          uses: images/fresh-image@v2
          level: warning
          with:
            max_days: 356
This policy aims to ensure that images admitted into the system are fresh, defined as being built within the last year. The fresh-image rule is applied with a warning level severity.
Pipeline Evaluation
Option only available when using
scribestore.
The pipeline option evaluates policies based on the image build runID and workflow. This allows you to run policies related to the image build pipeline.
select:
  gate-name: pipeline_gate
  gate-type: admission
  apply:
  - namespace: ""
    glob:
    - "my_company/**"
    filter-by:
    - pipeline
    initiative:
      config-type: initiative
      id: admission_pipeline_scanners
      name: pipeline-scanners initiative
      controls:
      - name: Vulnerability Check Control
        id: vuln-check
        rules:
          uses: sarif/verify-sarif@v2
          evidence:
            tool: "Trivy Vulnerability Scanner"
          with:
            rule_level:
              - critical
The policy named pipeline-scanners is applied, which requires that images admitted from the my_company Dockerhub repository undergo vulnerability scanning using Trivy. The check-vulnerabilities rule is defined within this policy, configured to check for any critical vulnerabilities in the image. If critical vulnerabilities are detected, the policy will trigger a violation, indicating a failure.
For CI integrations see CI integration
Collecting evidence in pipeline
For all our CI integration, the relevant fields are automatically set by our CI integration.
However, if you need to mock this locally, you can manually set the RUN_ID and WORKFLOW fields while collecting evidence. Once set, you can proceed to collect your scanner report and attach it as evidence in the pipeline.
# Create evidence in the pipeline
RUN_ID=44 WORKFLOW=my_workflow.yaml valint bom busybox:latest [FLAGS]

# Generate a third-party report
trivy image --format sarif -o report.sarif busybox:latest

# Attach the third-party SARIF report as evidence in the pipeline
RUN_ID=44 WORKFLOW=my_workflow.yaml valint evidence report.sarif [FLAGS]
Product Evaluation
Option only available when using
scribestore.
The product option evaluates policies based on the product, allowing you to verify critical aspects of the product evidence associated with the image.
select:
  gate-name: product_gate
  gate-type: admission
  apply:
  - namespace: ""
    glob:
    - "**"
    product-key: my-product
    filter-by:
    - product
    initiative:
      config-type: initiative
      id: admission_pipeline_scanners
      name: pipeline-scanners initiative
      controls:
      - name: Vulnerability Check Control
        id: vuln-check
        rules:
        - name: check-vulnerabilities
          uses: sarif/verify-sarif@v2
          evidence:
            tool: "Trivy Vulnerability Scanner"
          with:
            rule_level:
              - critical
In this example, the pipeline-scanners policy is applied to evaluate images associated with the my-product.
Specifically checking for vulnerabilities using the Trivy Vulnerability Scanner. This ensures that product undergo thorough vulnerability assessment.
If you keep
filter-by: product but omit product-key or product-version, the evaluator automatically derives the product name and version from the most recent image evidence reference.
Collecting evidence in product
To attach evidence to a product, use the product-key and product-version flags. Then, collect your scanner report and attach it as evidence in the product.
# Create evidence in the pipeline
# Create evidence in the product
valint bom busybox:latest --product-key my_product --product-version v1 [FLAGS]

# Generate a third-party report
trivy image --format sarif -o report.sarif busybox:latest

# Attach the third-party SARIF report as evidence in the product
valint evidence report.sarif --product-key my_product --product-version v1 [FLAGS]
Policy results
Policy results are generated individually for each image evaluation, delivered in Sarif format as evidence. For further details, please refer to the policy results page.
Admission Policy Results Context is attached with resource identification, including labels and namespaces, of the Kubernetes resources that were admitted, along with information about the admission provider.
Signing policy result
Currently, signing policy results are only supported when using X509 keys. To set this up:
- Set the
x509.keyfield to specify the policy result signer key. It must be under the same CA the evidence is verified in.
For example, to perform an upgrade with X509-based signing:
helm upgrade gatekeeper-valint scribe/gatekeeper-valint \
  --namespace gatekeeper-valint \
  --reuse-values --force \
  --set valint.attest.default=x509-env \
  --set valint.verify.formats=attest \
  --set x509.ca="$(cat certs/ca.crt)"
  --set x509.key="$(cat certs/evidence.key)"
Secret is stored under a secret named
valint-x509-secret.
Please replace the keys and certificates generated by our
scripts/generate-tls-cert.shfor evidence signing and verification with your organization's trusted CA.
Default Policy - Unsigned Image Warning
By default, the provider is installed with a policy to warn on ANY image that is not signed. This serves as a basic security measure to alert users about potentially risky, unsigned images.
To pass the evaluation, you can sign your images using the valint tool, like so:
valint [bom,slsa] some_image -o attest [FLAGS]
By default, the provider utilizes Sigstore verification. However, you have the option to configure the provider to use X509-based signatures instead. For configuration instructions, please refer to the respective sections on X509-based signatures or Sigstore.
Private registries
To verify images from registries that require authentication, follow these steps:
- Set the
image.imagePullSecretsfield with base64 docker config.
For example, to perform an upgrade with your local docker config:
helm upgrade scribe/gatekeeper-valint \
  --namespace gatekeeper-valint \
  --reuse-values --force \
  --set image.imagePullSecrets="$(cat ~/.docker/config.json | base64 | tr -d '\n')"
Secret created should follow the following pattern
apiVersion: v1
kind: Secret
metadata:
  name: valint-image-pull-secret
  namespace: gatekeeper-valint
data:
  .dockerconfigjson: ewoJImF1...g==
type: kubernetes.io/dockerconfigjson
Private Policy Bundles
By default policies are pulled from our default policy bundle. To use private bundles from your preferred Git platform, follow these steps:
- Set the
image.bundlePullSecretswith read access token to bundle git repository. - Set
valint.attest.bundlewith your required bundle details. - Optionaly set
valint.git.branchorvalint.git.tagto set the bundle git reference to pull.
For example, to perform an upgrade with your local docker config:
helm upgrade scribe/gatekeeper-valint \
  --namespace gatekeeper-valint \
  --reuse-values --force \
  --set valint.attest.bundle=https://github.com/my_company/policies.git
  --set image.bundlePullSecrets="ghp_****"
Secret is stored under a secret named
valint-bundle-pull-secret.
Uploading signed evidence
Using valint -o attest flag you can upload signed evidence on the image.
valint [bom, slsa] my_image -o attest [--oci]
alternative Evidence Stores
Valint supports both storage and verification flows for attestations and statement objects using an *OCI registry as an evidence store.
Using OCI registry as an evidence store allows you to upload and verify evidence across your supply chain in a seamless manner.
Related configmap flags:
valint.attest.cocosign.storer.OCI.enable- Enable OCI store.valint.attest.cocosign.storer.OCI.repo- Evidence store location.
Before you begin
To guarantee access requirements for the Provider, you need to provide an Image Pull secret with the following permissions:
- Read access to download evidence for the provider.
- Write access to upload policy report evidence for the provider.
Can be skipped when
valint.attest.report.disableis set to true
Access requirement for Evidence creation (CI or local)
- Write access to upload evidence using the
valinttool.
Install the provider with the following command:
helm install scribe/gatekeeper-valint --name-template=gatekeeper-valint \
  --namespace gatekeeper-valint --create-namespace \
  --set certs.caBundle=$(cat certs/ca.crt | base64 | tr -d '\n') \
  --set certs.tlsCrt="$(cat certs/tls.crt)" \
  --set certs.tlsKey="$(cat certs/tls.key)" \
  --set valint.attest.report.disable=true \
  --set image.imagePullSecrets="$(cat ~/.docker/config.json | base64 | tr -d '\n')" \
  --set valint.attest.cocosign.storer.OCI.enable=true \
  --set valint.attest.cocosign.storer.OCI.repo=[oci-repo]"
[oci-repo] is the URL of the OCI repository where all evidence will be uploaded.
- Example: If your oci repo is
somewhere/evidence_storecreate a evidence forexample/my_image:latest, the evidence will be stored as undersomewhere/evidence_store/image/SHA-256-DIGEST.sig
Cosign Style Evidence Attachment
If a dedicated oci-repo is not provided evidence assumed to b Attach the evidence to the same repo as the uploaded image.
- Example: If you create a evidence for
example/my_image:latest, the evidence will be stored asexample/my_image:SHA-256-DIGEST.sig(oci-repo).
Demo: Enforcing Image X509 Signing Policies Over OCI store
To showcase the enforcement of image signing policies using Gatekeeper Valint, we'll apply a simplistic unsigned image error policy and upgrade our gate accordingly.
Upgrade your gate with the following command,
helm upgrade gatekeeper-valint scribe/gatekeeper-valint \
  --values signed_image_policy.yaml \
  --namespace gatekeeper-valint \
  --set valint.attest.default=x509-env \
  --set x509.ca="$(cat certs/ca.crt)" \
  --reuse-values --force
x509.ca,valint-attest-defaultwill configure the provider to verify using the CA. We strongly recommend replacing CA certificates with those from your trusted organization.
signed_image_policy.yaml file
select:
  gate-name: signed_images_gate
  gate-type: admission
  apply:
  - namespace: "" # Any
    glob:
    - "mycompany/**"
    filter-by:
    - target
    initiative:
      config-type: initiative
      id: admission_pipeline_scanners
      name: pipeline-scanners initiative
      controls:
      - name: require_signed_images
        id: signed_images
        rules:
        - name: error_on_unsigned_image
          uses: sbom/artifact-signed@v2
          level: error
In the provided signed_image_policy.yaml, we specify a policy to enforce signature verification for images admitted from the my_company Dockerhub account.
Now lets try and apply deployments before signing the image.
kubectl apply -f signed-deployment.yaml 2>&1 | echo -e "$(cat -)"
signed-deployment.yaml file
apiVersion: apps/v1
kind: Deployment
metadata:
  name: signed-deployment
  labels:
    app: signed-deployment
spec:
  replicas: 0 # testing purposes only
  selector:
    matchLabels:
      app: signed-deployment
  template:
    metadata:
      labels:
        app: signed-deployment
    spec:
      containers:
      - name: valid
        image: mycompany/signed:latest
In the output, you should see a rejected admission error due to the unsigned image.
Error from server (Forbidden): error when creating "policy/examples/error.yaml": admission webhook "validation.gatekeeper.sh" denied the request: [gatekeeper-valint] image not accepted:

{"errors": [], "responses": [], "status_code": 200, "system_error": "\nScribe Admission refused 'devopps/alpine:notsigned' deployment to 'default'.\n\n- control check failed, Controls [admission-initiative/admission-control] failed with the following errors.\n* rule [admission-initiative/admission-control/sbom-signed] failed\n"}
make: *** [Makefile:210: error_test] Error 1
To resolve this, sign your image using the Valint tool:
valint bom mycompany/signed:latest -o attest \
  --components metadata \
  --oci --oci-repo [oci-repo] [FLAGS]
--components metadataminimizes the size of the SBOM.
Then, re-apply the deployment:
kubectl apply -f signed-deployment.yaml
Upon successful deployment, you'll see a detailed evaluation summary in the admission logs, providing insights into the policy checks performed and their outcomes.
│ [2025-06-05 10:15:25] INFO unassigned: Control "Unassigned Control" Evaluation Summary: │
│ │
│ ┌────────────────────────────────────────────────────────────────────────────────────────────────────────────────────────────────────────────────────────────────── │
│ │ [unassigned] Control "Unassigned Control" Evaluation Summary │
│ ├──────────────────────┬──────────────────────┬───────┬──────────┬────────┬──────────────────────┬───────────────────────────────────────────────────────────────── │
│ │ RULE ID │ RULE NAME │ LEVEL │ VERIFIED │ RESULT │ SUMMARY │ TARGET │
│ ├──────────────────────┼──────────────────────┼───────┼──────────┼─��───────┼──────────────────────┼───────────────────────────────────────────────────────────────── │
│ │ default-any-artifact │ default-any-artifact │ none │ false │ pass │ Statement validated. │ scribe-docker-public-local/test/valint_alpine_input:latest (imag │
│ │ │ │ │ │ │ │ e) │
│ ├──────────────────────┼──────────────────────┼───────┼──────────┼────────┼──────────────────────┼───────────────────────────────────────────────────────────────── │
│ │ CONTROL RESULT │ │ │ │ PASS │ │ │
│ └──────────────────────┴──────────────────────┴───────┴──────────┴────────┴──────────────────────┴───────────────────────────────────────────────────────────────── │
│ [2025-06-05 10:15:25] INFO unassigned: Initiative "Unassigned Initiative" Evaluation Summary: │
│ ┌─────────────────────────────────────────────────────────────────────────────────┐ │
│ │ [unassigned] Initiative "Unassigned Initiative" Evaluation Summary │ │
│ ├───────────────────┬────────────────────┬───────────────────────────────┬────────┤ │
│ │ CONTROL ID │ CONTROL NAME │ RULE LIST │ RESULT │ │
│ ├───────────────────┼────────────────────┼───────────────────────────────┼────────┤ │
│ │ unassigned │ Unassigned Control │ - default-any-artifact (pass) │ pass │ │
│ ├───────────────────┼────────────────────┼───────────────────────────────┼────────┤ │
│ │ INITIATIVE RESULT │ │ │ PASS │ │
│ └───────────────────┴────────────────────┴───────────────────────────────┴────────┘